Why Honey Garlic Shrimp Is So Popular
When it comes to weeknight dinners, few recipes check all the boxes like honey garlic shrimp. It’s quick to prepare, incredibly flavorful, and uses simple pantry staples. Whether you’re feeding a hungry family or making a cozy meal for two, this dish delivers maximum satisfaction with minimal effort.
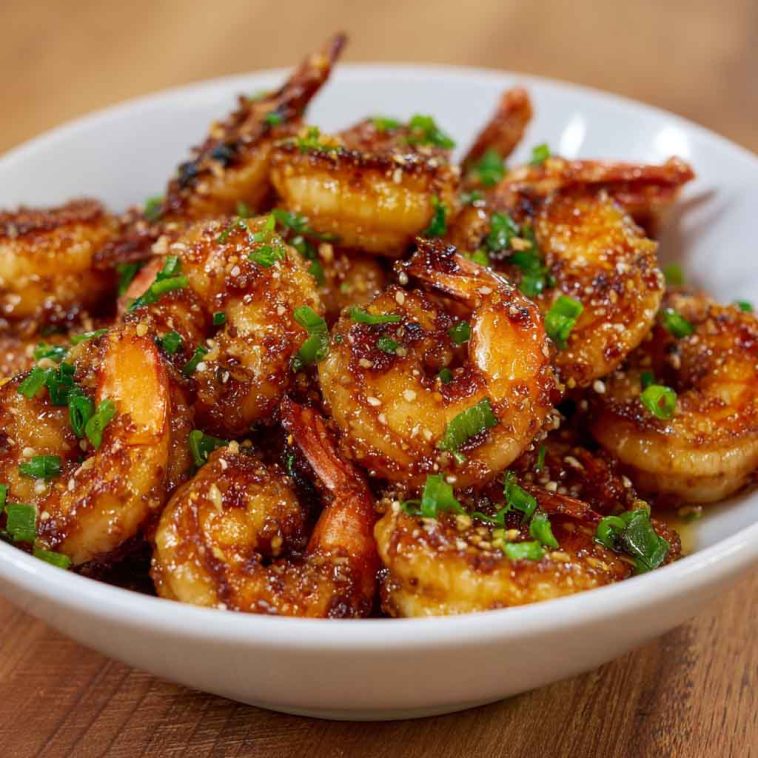
The sauce hits that perfect balance of sweet, savory, and garlicky, with a glossy, slightly sticky glaze that clings to every bite of juicy shrimp. It’s bold enough for adults yet mellow enough for picky eaters—especially when served over rice or with tender-crisp vegetables.
Another reason for its popularity? Versatility. This shrimp dish pairs beautifully with steamed jasmine rice, stir-fried noodles, roasted broccoli, or even tucked into lettuce cups for a light, low-carb meal. It comes together in under 30 minutes, making it a lifesaver for busy nights when you want something homemade but don’t want to fuss.
What Is Honey Garlic Shrimp?
Honey garlic shrimp is a stir-fried or sautéed shrimp dish coated in a glossy, flavorful glaze made from honey, garlic, and soy sauce. Some variations include ginger or a splash of citrus for brightness, and a touch of chili flakes or sriracha for heat.
Though not traditionally Asian, this dish is inspired by Asian-American takeout flavors—think General Tso’s Chicken or teriyaki shrimp—but lighter and faster to cook. It’s a fusion of ingredients commonly found in home kitchens that, together, produce a sauce that’s rich, balanced, and incredibly addictive.
Typically served with white or brown rice, noodles, or stir-fried vegetables, honey garlic shrimp is as customizable as it is crave-worthy. It can be made spicy or mild, gluten-free, or even adapted for low-sugar diets.
Whether you’re new to cooking seafood or just need a fast dinner win, this recipe is a reliable go-to—flavorful, fast, and surprisingly elegant on the plate.
Ingredient Highlights & Key Substitutions
Here’s a closer look at the simple ingredients that bring this recipe to life—and the smart swaps you can make:
Shrimp: Use large or jumbo shrimp, peeled and deveined. Tail-on adds a nice presentation, but tail-off is easier for eating. Fresh or frozen both work—just make sure to thaw completely and pat dry before cooking.
Honey: Adds a natural sweetness and helps the sauce thicken and caramelize. Maple syrup or agave nectar can be used in a pinch.
Garlic: Use fresh minced garlic for the best punch. Pre-minced is okay, but fresh truly elevates the flavor.
Soy Sauce: Delivers saltiness and umami. Use low-sodium soy sauce if desired, or tamari or coconut aminos for gluten-free options.
Ginger (optional): Adds a zingy, warm note that complements the sweetness of the honey. Use freshly grated or bottled ginger paste.
Oil: Neutral oils like canola, avocado, or vegetable oil are ideal. Avoid oils with strong flavors like olive oil, which may clash with the sauce.
Red Pepper Flakes or Sriracha (optional): For those who like a kick of heat.
Lemon or Lime Juice (optional): A squeeze adds brightness and cuts through the sweetness of the glaze.
Quick Dietary Swaps:
Gluten-free: Use tamari or coconut aminos instead of soy sauce.
Sugar-free: Use a sugar-free honey alternative or monk fruit syrup.
Bold Tip: For best flavor and texture, choose wild-caught shrimp over farm-raised whenever possible.
How to Choose and Prep Shrimp Like a Pro
Choosing the right shrimp and prepping it correctly makes a big difference in this dish:
Size Matters: Use large (31–40 count) or jumbo (16–25 count) shrimp for juicy, meaty bites that hold up to the bold sauce.
Peeled and Deveined: Save yourself prep time by buying shrimp that are already cleaned. If serving for guests, tail-on shrimp look more elegant. For easier eating, go tail-off.
Frozen vs. Fresh: Frozen shrimp are a great option—often fresher than what’s at the fish counter. Thaw them quickly by placing them in a colander under cold running water for 10–15 minutes.
Dry Them Well: Before cooking, pat shrimp dry with paper towels. This helps them brown properly and prevents excess water from thinning out your sauce.
Keeping shrimp prepped and ready means this recipe can hit the skillet and be on the table in under 30 minutes.
Step-by-Step Cooking Instructions for Honey Garlic Shrimp
1. Make the Sauce
In a small bowl, mix together:
⅓ cup honey
¼ cup low-sodium soy sauce
3–4 cloves garlic, minced
1 teaspoon freshly grated ginger (optional)
A dash of red pepper flakes or sriracha (if you like heat)
2. (Optional) Marinate the Shrimp
Place cleaned shrimp in a bowl with 2 tablespoons of the sauce. Let sit for 15–30 minutes to absorb flavor. Do not marinate too long or the shrimp can become mushy.
3. Cook the Shrimp
Heat 1 tablespoon oil in a large skillet over medium-high heat. Once hot, add shrimp in a single layer (do not overcrowd). Sear for about 1–2 minutes per side, until pink and just curled.
4. Add the Sauce
Pour the remaining sauce into the pan. Simmer for 2–3 minutes, stirring gently, until the sauce thickens slightly and coats the shrimp in a glossy glaze.
5. Garnish & Serve
Remove from heat and sprinkle with chopped green onions, sesame seeds, or a squeeze of lime juice.
Serve immediately with rice, noodles, or vegetables.
Bold Tip: Sear the shrimp in batches if needed—overcrowding the pan will steam them, not sear them. You want that light browning for flavor and texture!
Popular Variations & Flavor Add-Ins
Honey garlic shrimp is a fantastic base recipe that invites all kinds of delicious spins. Whether you’re craving heat, brightness, or creaminess, there’s a variation for you:
Spicy Honey Garlic Shrimp: Kick up the heat by adding red chili flakes, a drizzle of sriracha, or even hot honey to the sauce.
Crispy Honey Garlic Shrimp: For extra crunch, toss shrimp in cornstarch before pan-frying. This gives them a golden exterior that pairs beautifully with the sticky glaze.
Lemon Honey Garlic Shrimp: Add fresh lemon zest and juice for a bright, tangy contrast to the sweetness of the honey.
Coconut Honey Garlic Shrimp: Stir in a splash of coconut milk for a rich, tropical flair that balances beautifully with the garlic and soy.
Honey Garlic Shrimp Skewers: Thread shrimp onto skewers and grill or air fry for a smoky twist. Perfect for summer gatherings or appetizers.
Each variation adds a new layer of flavor while keeping the core combination of sweet, savory, and garlicky intact. These twists are simple, customizable, and perfect for keeping weeknight dinners exciting.
What to Serve with Honey Garlic Shrimp
Honey garlic shrimp is super versatile when it comes to sides and pairings. Here are some favorites that round out the meal:
Starches: Pair it with fluffy jasmine rice, brown rice, quinoa, garlic noodles, or couscous for a satisfying base to soak up the sauce.
Vegetables: Serve with stir-fried broccoli, snow peas, baby bok choy, or bell peppers for color, crunch, and balance.
Wraps & Bowls: Try it in lettuce cups for a fun, hand-held version, or build a rice bowl with avocado, pickled veggies, and sesame seeds.
Low-Carb Options: Swap grains for cauliflower rice or zoodles (zucchini noodles) for a lighter take.
This dish works well as a centerpiece or as part of a multi-dish spread, especially when combined with Asian-inspired starters like dumplings or edamame.
Make-Ahead, Storage, and Reheating Tips
Make-ahead and storage tips make this dish even more practical for busy home cooks:
Leftovers: Store in an airtight container in the refrigerator for up to 3 days. The flavors will deepen, but the shrimp may lose some of their original texture.
Reheating: Warm gently in a skillet over low heat or microwave in short bursts. Avoid high heat, which can overcook the shrimp and make them rubbery.
Freezing: Not recommended once cooked, as the texture of shrimp becomes mushy. However, the sauce can be made in advance and frozen.
Meal prep tip: Marinate the shrimp in advance and store in the fridge for up to 12 hours. That way, you can throw everything together in minutes when you’re ready to cook.
This recipe thrives on speed and freshness, so enjoy it soon after it’s made for the best texture and flavor.
Troubleshooting Common Mistakes
- Even simple recipes have their pitfalls. Here’s how to avoid the most common honey garlic shrimp mistakes:
Rubbery Shrimp? That’s a sign of overcooking. Shrimp cook quickly—just 1–2 minutes per side.
Sauce Too Runny? It may need more time to simmer and reduce. Let it cook down until thick and glossy, or stir in a cornstarch slurry (1 tsp cornstarch + 1 tbsp water).
Too Salty? Opt for low-sodium soy sauce or dilute the sauce with water or lemon juice to balance the flavors.
Garlic Burned? Burned garlic tastes bitter. Add it after shrimp are mostly cooked or cook over medium rather than high heat.
Shrimp Not Browning? Make sure they’re patted dry and the pan is hot before adding them. Overcrowding will steam them instead of searing.
Following a few simple techniques ensures restaurant-worthy results every time.
FAQs: What People Also Ask About Honey Garlic Shrimp
Q: Can I make honey garlic shrimp in the oven or air fryer?
A: Yes! To bake, place shrimp on a foil-lined tray and cook at 400°F (200°C) for 8–10 minutes. For the air fryer, cook at 375°F (190°C) for 6–8 minutes. Brush or toss in sauce after cooking for the best texture.
Q: Can I use frozen shrimp?
A: Absolutely. Just thaw completely under cold running water, then pat dry to prevent sogginess and ensure proper searing.
Q: How do I make the sauce thicker?
A: Simmer the sauce longer until it reduces naturally, or stir in a cornstarch slurry at the end for quicker thickening.
Q: Is honey garlic shrimp gluten-free?
A: It can be! Just use tamari or coconut aminos in place of soy sauce to avoid gluten.
Q: What type of honey is best for this recipe?
A: Use raw, clover, or light wildflower honey for neutral sweetness. Avoid heavily floral varieties like buckwheat or manuka, which may overpower the dish.
Whether you’re a first-time cook or a seasoned seafood lover, these tips ensure every batch of honey garlic shrimp comes out just right.
Expert Tips for the Best Honey Garlic Shrimp Every Time
Marinate shrimp briefly for flavor—15 to 30 minutes is enough
High heat sears shrimp quickly and enhances texture
Use a non-stick or cast iron skillet for the best browning
Cook in batches to avoid overcrowding and steaming
Pat shrimp dry before cooking for optimal caramelization
Add a squeeze of fresh lime or lemon juice at the end to brighten flavors
Garnish with green onions, sesame seeds, or fresh herbs for contrast and presentation
With just a few pro tips, you’ll go from good shrimp to unforgettable shrimp.
Final Thoughts: A Weeknight Wonder Worth Repeating
Honey garlic shrimp is the kind of recipe that becomes an instant classic in your kitchen—fast, flavorful, and endlessly flexible. With its sweet-savory glaze and succulent texture, it satisfies every craving and pairs with just about any side.
Loved by kids, adults, and everyone in between, it’s a go-to dish for nights when time is short but taste still matters. Once you’ve mastered the basics, you can riff on it endlessly with citrus, spice, or crunch.
It’s proof that with a few ingredients and smart technique, even the busiest weeknight can taste a little bit special.

Honey Garlic Shrimp
Equipment
- Large non-stick or cast iron skillet
- Mixing bowls
- Tongs or spatula
- Measuring spoons/cups
- Optional: colander for thawing shrimp
Ingredients
For the Sauce:
- ⅓ cup honey
- ¼ cup low-sodium soy sauce (or tamari for gluten-free)
- 3–4 garlic cloves, minced
- 1 teaspoon grated fresh ginger (optional)
- ½–1 teaspoon red pepper flakes or 1 teaspoon sriracha (optional)
For the Shrimp:
- 1 pound large or jumbo shrimp, peeled and deveined (tail-on optional)
- 1 tablespoon neutral oil (canola, avocado, or vegetable)
- Optional garnish: green onions, sesame seeds, lime wedges
Instructions
Mix the Sauce
- In a bowl, whisk together honey, soy sauce, garlic, ginger (if using), and red pepper flakes or sriracha (if desired).
(Optional) Marinate the Shrimp
- Add shrimp and 2 tablespoons of the sauce to a bowl. Marinate for 15–30 minutes in the fridge for deeper flavor.
Sear the Shrimp
- Heat oil in a large skillet over medium-high heat. Add shrimp in a single layer and cook for 1–2 minutes per side, or until pink and curled. Do not overcrowd the pan—cook in batches if needed.
Add the Sauce
- Pour in remaining sauce and simmer for 2–3 minutes, stirring occasionally, until it thickens and coats the shrimp.
Finish & Serve
- Remove from heat. Garnish with chopped green onions, sesame seeds, or lime juice. Serve immediately over rice, noodles, or veggies.
Notes
- Too much sauce? Drizzle only what you need; store leftovers in the fridge.
- Make it crispy: Toss shrimp in cornstarch before pan-frying.
- Make it creamy: Add a splash of coconut milk for richness.
- Make it brighter: Add lemon or lime zest to the sauce.
- Storage: Refrigerate leftovers up to 3 days. Not ideal for freezing once cooked.
- Make ahead: The sauce can be made and stored up to 1 week in advance. Shrimp can be marinated a few hours before cooking.