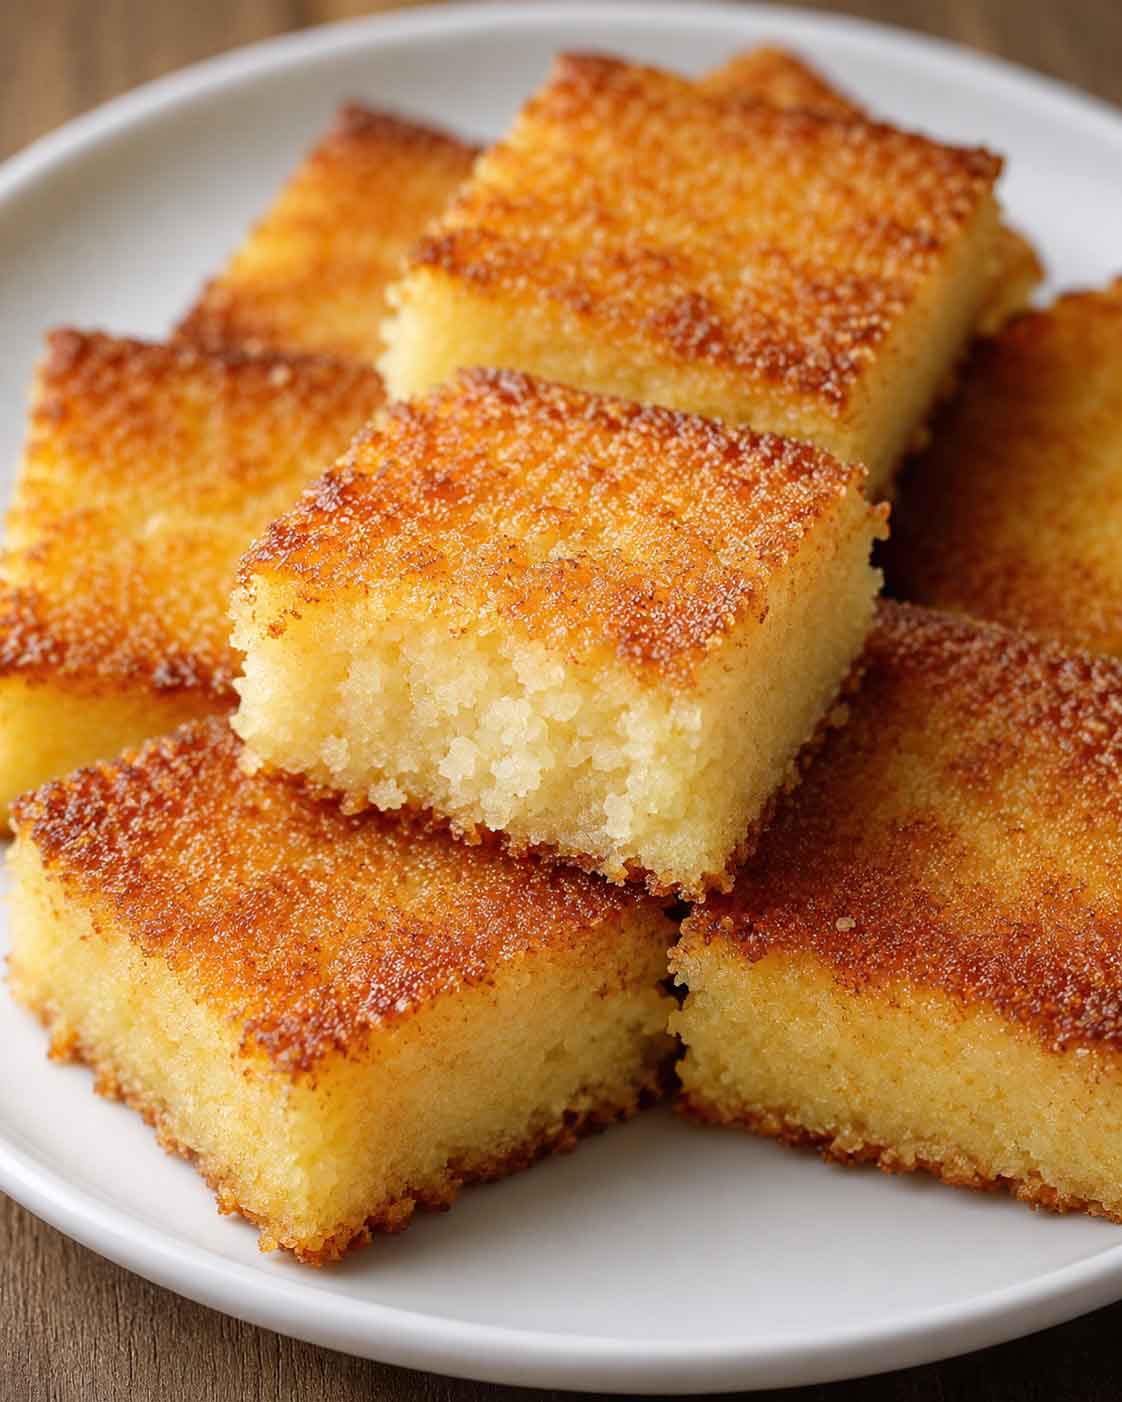
Best Easy 3-Ingredient Lemon Bars: The Ultimate Shortcut to Citrus Perfection
There’s something about lemon bars that feels both nostalgic and indulgent—that perfect balance of sweet and tart, creamy and crumbly. But traditional recipes? They can be a labor of love. Between zesting, juicing, measuring flour and sugar, separating eggs, and babysitting a finicky custard, you might spend an hour in the kitchen just to satisfy a citrus craving.
What if I told you that you could achieve that same bright, sunshine-filled flavor with just three ingredients and zero fuss?
Yes, you read that right. These 3-ingredient lemon bars are the dessert shortcut you never knew you needed. Whether you’re a seasoned baker looking for a quick fix or a complete beginner stepping into the kitchen for the first time, this recipe delivers bakery-quality results with minimal effort. No complicated techniques, no mile-long shopping list, and no special equipment required.
In this comprehensive guide, I’ll walk you through everything you need to know—from the science behind why these bars work so beautifully, to step-by-step instructions for three different 3-ingredient lemon bars variations, plus pro tips, storage advice, and answers to all your burning questions. Let’s dive in!
Why You’ll Love These 3-Ingredient Lemon Bars
Before we get to the recipes, let’s talk about why these 3-ingredient lemon bars have become a viral sensation in the minimalist baking community.
Minimal cleanup. Most versions require just one mixing bowl and a baking dish. No mountains of dirty dishes.
No special skills required. If you can whisk and pour, you can make these bars. No crust rolling, no tempering eggs, no complicated pastry techniques.
Bright, authentic lemon flavor. Unlike some shortcuts that sacrifice taste for convenience, these bars deliver a genuine citrus punch that rivals traditional recipes.
Budget-friendly. You likely already have these pantry staples in your kitchen, making this a cost-effective way to satisfy a sweet tooth.
Foolproof. Without the need for measuring flour, baking powder, or salt separately, there is very little room for error.
Naturally gluten-free adaptable. Several versions of this recipe are naturally gluten-free, making them accessible to those with dietary restrictions.
The Science Behind the Magic
What makes a 3-ingredient lemon bars recipe work so brilliantly? It all comes down to chemistry.
The Condensed Milk + Lemon Juice Reaction
When you combine sweetened condensed milk with fresh lemon juice, something magical happens. The acid from the lemon juice reacts with the proteins in the condensed milk, causing the mixture to thicken almost instantly. This natural chemical reaction creates a custard-like texture without eggs, without heat, and without artificial thickeners.
In fact, one version of this recipe relies entirely on this reaction—the filling sets via natural lemon acid reaction, making it a true no-bake bar.
The Cake Mix Shortcut
The cake mix version of these 3-ingredient lemon bars works on a different principle. By using a boxed cake mix as the base, you eliminate the need for measuring flour, sugar, baking powder, and salt separately. The butter binds the dry mix into a crumbly crust and topping, while the lemon pie filling bakes into a glossy, vibrant layer.
This approach is particularly popular in Midwestern kitchens, where practical, crowd-pleasing dishes reign supreme.
Three Ways to Make 3-Ingredient Lemon Bars
I’m giving you three different variations of 3-ingredient lemon bars so you can choose the one that best fits your pantry, your dietary needs, and your preference for texture.
Variation 1: No-Bake Magic Lemon Bars (Crust + Filling)
The truest minimalist version—no oven required!
These 3-ingredient lemon bars are made with a pre-made graham cracker crust, sweetened condensed milk, and fresh lemon juice. They’re creamy, tangy, and set beautifully in the fridge.
| Detail | Info |
|---|---|
| Servings | 9–16 bars (depending on how you cut them) |
| Estimated Cost | $4.00 – $5.50 |
| Prep Time | 15 minutes |
| Cook Time | 0 minutes (no baking!) |
| Chill Time | 4 hours (or overnight) |
| Total Time | 4 hours 15 minutes |
| Course | Dessert |
| Cuisine | American |
| Calories | ~180–220 kcal per bar |
Ingredients
2 cups (about 200g) plain biscuit crumbs – graham crackers, digestives, or butter cookies (ensure fine crumbs)
1 can (14 oz / 397g) sweetened condensed milk (full-fat gives the best creamy texture)
½ cup (120 ml) fresh lemon juice – from about 3–4 medium lemons, strained
Optional (not counted in the 3 ingredients): Pinch of salt (enhances flavor), powdered sugar for dusting
Instructions
Prepare the crust base. Place the biscuit crumbs in a medium bowl. Add 3 tablespoons of the sweetened condensed milk (reserve the rest for the filling). Mix until the crumbs are evenly moistened. The mixture should feel like wet sand and hold together when pressed.
Press the crust. Line an 8×8-inch square baking pan with parchment paper, leaving overhang for easy removal. Transfer the crumb mixture into the pan. Press firmly and evenly into a flat layer using a glass or measuring cup. For a firmer crust, chill in the refrigerator while preparing the filling.
Make the lemon filling. In a clean bowl, pour the remaining sweetened condensed milk (should be about 1¼ cups minus the tablespoons used). Add the fresh lemon juice all at once. Whisk vigorously until the mixture thickens noticeably—within 30 to 60 seconds. The acid immediately begins to coagulate the milk protein.
Assemble and set. Pour the thickened lemon filling over the crust. Spread evenly with a spatula. Tap the pan gently on the counter to remove air bubbles. Refrigerate uncovered for at least 4 hours, or overnight, until the filling is firm and sliceable.
Slice and serve. Lift the bars from the pan using the parchment overhang. Use a sharp knife (wipe clean between cuts) to slice into 9 or 16 squares. For cleaner edges, chill the knife first. Dust with powdered sugar if desired. Serve cold directly from the refrigerator.
Variation 2: Baked Custard-Style Lemon Bars (Egg + Condensed Milk)
The closest to traditional lemon bars—creamy, custard-like, and naturally gluten-free.
These 3-ingredient lemon bars use eggs, sweetened condensed milk, and fresh lemon juice. They bake into two distinct layers: a soft, custard-like lemon filling over a denser bottom that forms naturally during baking.
| Detail | Info |
|---|---|
| Servings | 9–12 bars |
| Estimated Cost | $3.50 – $4.50 |
| Prep Time | 10 minutes |
| Cook Time | 20–25 minutes |
| Chill Time | 2 hours |
| Total Time | ~2 hours 35 minutes |
| Course | Dessert |
| Cuisine | American |
| Calories | ~160–200 kcal per bar |
Ingredients
1 can (14 oz / 397g) sweetened condensed milk (full-fat, not evaporated milk)
½ cup (120 ml) freshly squeezed lemon juice (from about 3–4 medium lemons)
3 large eggs (room temperature recommended)
Optional (not counted in the 3 ingredients): Powdered sugar for dusting, lemon zest for garnish
Instructions
Preheat and prep. Preheat the oven to 325°F (160°C). Grease an 8×8-inch square baking dish or line it with parchment paper, leaving overhang on two sides for easy removal.
Prepare the lemon juice. Juice fresh lemons until you have exactly ½ cup. Remove any seeds but do not strain the pulp—it adds natural texture.
Whisk eggs and condensed milk. In a medium bowl, beat the 3 large eggs until frothy and pale (about 1 minute). Pour in the entire can of sweetened condensed milk and whisk thoroughly until completely smooth and combined.
Add lemon juice. While whisking continuously, slowly add the ½ cup of fresh lemon juice. The mixture will begin to thicken slightly—this is the acid starting to interact with the proteins. Whisk until uniform and no streaks remain.
Pour and bake. Scrape the batter into the prepared baking dish. Tilt the dish to spread evenly. The mixture will be liquid but will set during baking.
Bake for 20 to 25 minutes. The edges should look set and slightly golden, while the center will still have a slight jiggle (similar to a firm custard). Do not overbake; a toothpick inserted near the edge should come out clean, but the very middle may be moist.
Cool and chill. Cool completely at room temperature (about 1 hour), then refrigerate for at least 2 hours. Chilling is essential for clean slicing.
Slice and serve. Lift bars from the pan using parchment overhang. Cut into 9 or 12 squares. Dust with powdered sugar if desired. Serve cold or at room temperature.
Variation 3: Cake Mix Lemon Bars (Crumbly, Buttery, and Foolproof)
The ultimate shortcut—uses boxed cake mix for a buttery crust and topping.
These 3-ingredient lemon bars are made with cake mix, butter, and lemon pie filling. They’re soft, tangy, and come together in just 30 minutes.
| Detail | Info |
|---|---|
| Servings | 12–16 bars |
| Estimated Cost | $3.00 – $4.00 |
| Prep Time | 10 minutes |
| Cook Time | 25–30 minutes |
| Total Time | ~35–40 minutes |
| Course | Dessert |
| Cuisine | American |
| Calories | ~180–220 kcal per bar |
Ingredients
1 box (15.25–16.5 oz) yellow cake mix (or lemon cake mix for extra lemony flavor)
½ cup (1 stick) unsalted butter, softened (not melted)
1 can (21 oz) lemon pie filling
Optional (not counted in the 3 ingredients): Powdered sugar for dusting, lemon zest for garnish
Instructions
Preheat and prep. Preheat oven to 350°F (175°C) and grease a 9×13-inch baking dish or line it with parchment paper.
Make the crumb mixture. In a large bowl, combine the dry cake mix and softened butter. Mix until crumbly. You can use a pastry blender, a fork, or an electric mixer.
Press the crust. Press 2/3 of the crumb mixture into the bottom of the prepared pan. It doesn’t have to be perfect, but it should be level.
Add the filling. Spread the lemon pie filling evenly over the crust. Try to resist the urge to taste it straight from the can!
Add the topping. Sprinkle the remaining crumb mixture over the top. Gently press it down to make sure it sticks.
Bake. Bake for 25–30 minutes, until lightly golden and bubbling at the edges. Start checking for doneness at 22 minutes, as ovens vary.
Cool and slice. Cool completely, then refrigerate for 1–2 hours for cleaner slices. Cut into squares and serve.
Nutritional Information
Nutritional content varies depending on which 3-ingredient lemon bars variation you choose. Here’s a general overview:
| Variation | Calories | Carbs | Protein | Fat |
|---|---|---|---|---|
| No-Bake (Crust + Filling) | ~180–220 | ~30–35g | ~4–5g | ~6–8g |
| Baked Custard-Style | ~160–200 | ~25–30g | ~5–6g | ~6–8g |
| Cake Mix | ~180–220 | ~30–35g | ~2–3g | ~8–10g |
For comparison, a standard store-bought lemon bar typically contains 160–220 calories with a similar macronutrient profile. The cake mix version tends to be higher in fat due to the butter content, while the no-bake version relies on the fat from condensed milk.
Pro Tips for Perfect 3-Ingredient Lemon Bars
For the No-Bake Version
Use full-fat sweetened condensed milk. It gives the creamiest texture. Fat-free versions can be used but may require slightly less lemon juice.
Fresh lemon juice is essential. Bottled, pasteurized juice often contains preservatives and has a less bright flavor, which can also affect the setting because natural acidity levels vary.
Chill thoroughly. Don’t rush the chilling process—at least 4 hours is necessary for the bars to set properly.
For firmer bars, you can chill them overnight.
For the Baked Custard Version
Room temperature eggs incorporate more smoothly into the mixture.
Do not overbake. The center should still have a slight jiggle when you gently shake the pan. Overbaking can make the bars rubbery.
Chilling is non-negotiable. The bars need at least 2 hours in the fridge for clean slicing.
For the Cake Mix Version
Use softened butter, not melted. Melted butter will make the crust too greasy.
Press the crust firmly. A well-packed crust prevents the filling from seeping through.
Cool completely before slicing. Warm bars will fall apart. Refrigerating for 1–2 hours gives you the cleanest cuts.
Wipe your knife between cuts for neat, professional-looking squares.
For All Versions
Line your pan with parchment paper. This makes removal effortless and keeps your bars intact.
Dust with powdered sugar just before serving. If you dust too early, the sugar will dissolve into the bars.
Serve chilled or at room temperature. Both work beautifully, though chilled bars are easier to slice.
Storage & Make-Ahead Tips
These 3-ingredient lemon bars are perfect for making ahead of time.
Refrigerator: Store in an airtight container for up to 4 days.
Freezer: Freeze for up to 2 months. Thaw overnight in the refrigerator before serving.
Make ahead: These bars are perfect to prepare the day before serving.
Frequently Asked Questions
Can I use bottled lemon juice instead of fresh?
Fresh lemon juice is strongly recommended for the best results. Bottled, pasteurized juice often contains preservatives and has a less bright flavor, which can also affect the setting because natural acidity levels vary.
Why are my lemon bars runny?
Underbaking (for the baked version) or insufficient chilling (for the no-bake version) are the most common reasons. Bake until the edges are set and the center jiggles only slightly. For no-bake bars, ensure you’ve chilled for at least 4 hours.
Can I make these gluten-free?
Yes! For the no-bake version, simply use certified gluten-free biscuits or graham crackers. The baked custard version is naturally gluten-free. For the cake mix version, use a gluten-free cake mix.
Can I use different fruit fillings?
Absolutely! The cake mix version works beautifully with cherry, blueberry, or even apple pie filling. However, lemon provides the classic “bar” experience that everyone loves.
My bars are too sticky. What happened?
This usually happens if they haven’t cooled long enough or if the humidity is very high. Try chilling them in the refrigerator for an hour before slicing.
Can I make these dairy-free?
Yes! For the no-bake version, swap the sweetened condensed milk for sweetened condensed coconut milk. For the baked version, dairy-free alternatives exist but may require some experimentation.
Final Thoughts
These 3-ingredient lemon bars prove that delicious desserts don’t need to be complicated. With just a few pantry staples, you can create something that tastes bright, homemade, and satisfying.
Whether you choose the no-bake version for a quick, no-fuss treat, the baked custard version for something closer to the traditional experience, or the cake mix version for maximum convenience, you’re guaranteed a dessert that will disappear fast at any gathering.
So grab your lemons, your condensed milk, and your favorite shortcut ingredient, and get ready to make the easiest, most delicious 3-ingredient lemon bars of your life. Your taste buds—and your guests—will thank you!




Be First to Comment