Why Salted Caramel Apple Pie Bars Are the Ultimate Fall Treat
There’s something undeniably cozy about the warm, comforting flavors of apple pie — but imagine all that deliciousness in a portable, easy-to-eat bar form. Enter salted caramel apple pie bars, the ultimate fall dessert that takes the classic combination of tart apples, buttery crust, and luscious salted caramel and transforms it into a crowd-pleasing treat perfect for any occasion.
Whether you’re hosting a casual get-together, looking for a holiday dessert that’s easy to slice and serve, or just craving something sweet and seasonal, these bars hit all the right notes. The gooey caramel, balanced with a hint of sea salt, enhances the natural sweetness and tartness of the apples, while a crisp, buttery crust provides the perfect base.
In this recipe, you’ll discover a foolproof way to bake these irresistible bars with tips and tricks to nail the perfect texture and flavor every time.
What Makes Salted Caramel Apple Pie Bars Special?
Salted caramel apple pie bars combine the best elements of a traditional apple pie with the convenience of bars, making them a favorite for busy bakers and dessert lovers alike. Instead of wrestling with flaky pie crusts and slicing wedges, these bars offer neat, handheld portions without sacrificing any of the rich flavor or comforting texture.
The magic lies in the balance: tart, tender apples mingle with sweet, buttery caramel infused with just the right amount of sea salt to elevate the flavors and cut through the sweetness. This contrast is what makes every bite so memorable.
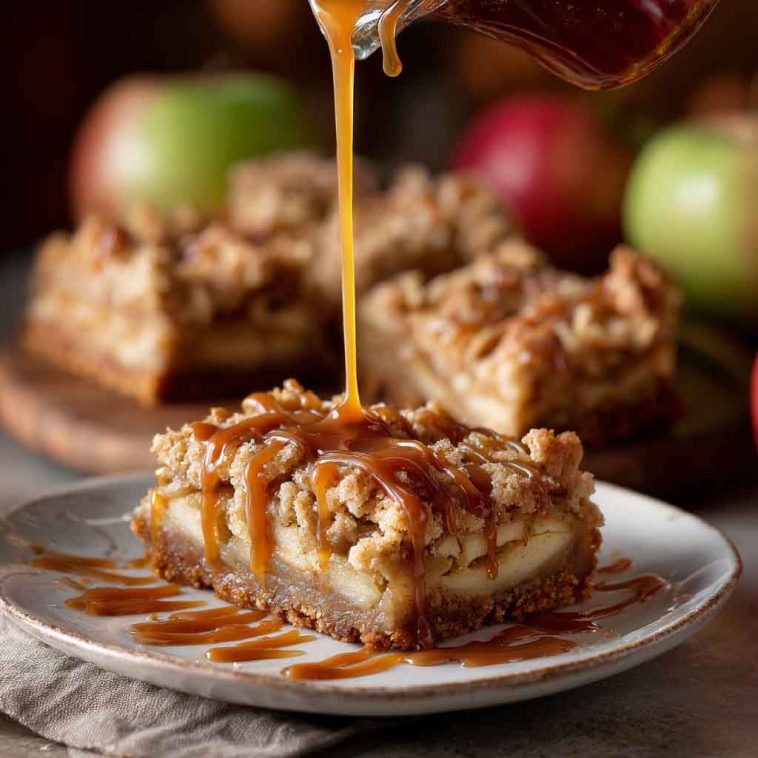
Texturally, these bars shine by layering a crisp, buttery crust with a soft, spiced apple filling and a decadent, slightly sticky caramel layer. The caramel doesn’t overwhelm; it perfectly complements the fruit’s brightness and the crust’s flakiness.
Plus, bars are great for portion control and easy sharing—no forks or plates needed! This makes salted caramel apple pie bars perfect for fall festivals, potlucks, or cozy family dinners.
Ingredient Spotlight: Picking the Best Apples, Caramel & Crust Ingredients
Apples:
Choosing the right apples is key to achieving that perfect balance of tartness and sweetness. Varieties like Granny Smith provide a crisp, tangy bite that stands up well to baking, while Honeycrisp adds juiciness and natural sweetness. Braeburn apples are another excellent choice, offering a nice balance and firm texture. Combining tart and sweet apples can also enhance complexity. Avoid overly soft apples, which can become mushy during baking.
Salted Caramel:
You can use store-bought caramel sauce for convenience, but homemade salted caramel truly elevates the flavor and texture. Homemade caramel allows you to control the salt level, sweetness, and thickness. Salt acts as a flavor enhancer, intensifying the caramel’s buttery richness and balancing the apple’s natural acidity.
Crust:
A buttery shortbread crust is a popular choice here, providing a sturdy, crisp base that contrasts beautifully with the tender filling. You can also use a traditional pie crust or a crumbly oat-based crust for a nuttier texture. The key is balancing flakiness with enough structure to hold the bars without becoming soggy. For best results, chill the crust dough before pressing into the pan.
Spices:
Classic fall spices like cinnamon and nutmeg warm the apple filling with aromatic depth. A pinch of cloves or allspice can be added for extra warmth, but use sparingly to avoid overpowering the fruit.
Sweeteners:
A mix of granulated sugar and brown sugar adds layered sweetness and moisture. Brown sugar, with its molasses content, pairs beautifully with caramel. Some recipes incorporate a bit of caramel sugar or maple syrup to deepen the flavor.
Optional Add-ins:
Chopped pecans or walnuts add crunch and a toasty flavor, while a handful of rolled oats can lend a rustic texture to the crust or topping. A splash of vanilla extract enhances all the flavors subtly.
Pro Tip:
The quality of your ingredients and careful layering are critical. Using fresh, crisp apples, good-quality butter, and fresh spices will make your bars stand out. Don’t rush the layering—each component should be even and thoughtfully distributed for the perfect bite.
Essential Equipment & Prep Tips
l works best to ensure even baking and easy slicing. Glass pans help you see when the crust edges are golden, while metal pans heat quickly and promote crispness.
Tools needed include mixing bowls, a pastry cutter or food processor for blending the crust dough, and a sharp knife or mandoline for peeling and slicing apples thinly and evenly.
To prevent a soggy crust, ensure apples are well-drained if you pre-cook or macerate them. Chilling the crust before baking also helps maintain flakiness. For the caramel layer, warm it slightly before drizzling to spread evenly.
Step-by-Step Recipe Walkthrough
Making the Crust:
Combine flour, sugar, and cold butter in a bowl or food processor until crumbly but pressable. Press the mixture evenly into your prepared baking pan. For a crisper crust, pre-bake at 350°F (175°C) for 10–12 minutes until lightly golden.
Preparing the Apple Filling:
Peel, core, and slice apples thinly and uniformly. Toss them gently with cinnamon, nutmeg, sugar, and a pinch of salt to coat evenly. This seasoning warms the fruit and balances sweetness.
Layering the Bars:
Spread the apple mixture evenly over the crust. Be careful not to pile too high; a single layer ensures even baking and prevents sogginess.
Adding Salted Caramel:
Drizzle warmed salted caramel sauce over the apples using a spoon or squeeze bottle. For a thicker caramel layer, spread gently with a spatula. You can swirl it lightly for a marbled effect or keep it evenly distributed.
Optional Topping:
If desired, sprinkle a crumb topping made from flour, brown sugar, butter, and oats, or scatter sliced almonds for added crunch. You can also drizzle more caramel after baking for extra indulgence.
Baking:
Bake at 350°F (175°C) for 35–40 minutes. Look for golden edges and bubbling caramel as signs the bars are done.
Cooling and Slicing:
Allow bars to cool completely in the pan on a wire rack. Then refrigerate for at least 2 hours or overnight to let the caramel set firmly, which helps with clean slicing.
Bold Tip:
Chilling before cutting is essential—it prevents the caramel from sticking and ensures neat, tidy bars that hold their shape when served.
Tasty Variations on Salted Caramel Apple Pie Bars
Salted caramel apple pie bars are delicious as is, but don’t hesitate to experiment with these tasty variations to make them uniquely yours.
Add a Streusel or Oat Topping:
A buttery streusel topping made from flour, brown sugar, and oats adds a delightful crunch that contrasts beautifully with the tender apples and smooth caramel. This is perfect if you crave texture or want to amp up the rustic, homey feel.
Swap Apples for Pears or Mixed Fall Fruits:
Pears bring a juicy sweetness that pairs well with caramel, offering a milder alternative to tart apples. You can also mix apples with pears, cranberries, or even diced quince for a seasonal medley bursting with flavor.
Bourbon or Maple-Infused Caramel:
For an adult twist, stir a tablespoon of bourbon into your caramel sauce for warm, smoky notes. Alternatively, maple syrup can be used either in the caramel or drizzled on top, adding rich, earthy sweetness that complements fall flavors.
Gluten-Free Crust Options:
Use almond flour, oat flour, or gluten-free baking mixes for the crust to accommodate dietary needs without sacrificing flavor or texture. Adding a small amount of xanthan gum can improve structure.
Vegan Adaptations:
Swap butter for plant-based margarine or coconut oil and use dairy-free caramel sauces or make your own with coconut milk and coconut sugar. Vegan bars are just as indulgent and crowd-friendly.
Nut Additions:
Toasted pecans or walnuts scattered on top or mixed into the streusel provide nutty crunch and depth.
Pro Tip:
When using juicier fruits like pears or mixed berries, reduce added liquids or toss the fruit with a bit of flour or cornstarch to prevent sogginess and keep the crust crisp.
Serving Suggestions & Presentation Ideas
Salted caramel apple pie bars are delicious served warm, straight from the oven or reheated gently. Pair them with a scoop of creamy vanilla ice cream or a dollop of freshly whipped cream to enhance their comforting richness.
For a simple yet stunning touch, sprinkle flaky sea salt over the top just before serving to highlight the salted caramel notes and add a pleasant crunch. Drizzling extra caramel sauce over each bar also amps up the indulgence and visual appeal.
For gatherings, present your bars in rustic baskets lined with parchment paper or on a wooden cutting board to evoke a cozy, farmhouse vibe—perfect for fall potlucks, holiday dessert tables, or casual family dinners.
Add a few fresh apple slices or sprigs of mint as a garnish to brighten the presentation and bring a fresh contrast.
Storage, Shelf Life & Make-Ahead Tips
Store salted caramel apple pie bars in an airtight container at room temperature if you plan to eat them within 1-2 days. For longer freshness, refrigerate them—this helps preserve the caramel’s texture and keeps the apples fresh for up to 3-5 days.
When refrigerated, allow the bars to come to room temperature or warm gently in the oven or microwave before serving for the best texture and flavor.
To freeze, wrap individual bars tightly in plastic wrap and place them in a freezer-safe container or bag. They freeze well for up to 3 months. Thaw overnight in the refrigerator and warm gently before serving to prevent sogginess and maintain that perfect caramel consistency.
For holiday entertaining or busy weeks, bake the bars a day or two ahead. Store chilled and slice just before serving to keep edges neat and caramel firm.
Troubleshooting Common Problems
Bars Too Soggy:
This is often caused by excess liquid from the fruit or underbaked crust. To fix, toss fruit with a little flour or cornstarch before layering and ensure the crust is pre-baked slightly to form a barrier.
Caramel Too Runny or Hardening:
If your caramel runs too much, it may need longer cooking to thicken or cooling time before layering. If it hardens too much, warm gently before drizzling. Using the right ratio of cream to sugar is key for perfect texture.
Crust Too Crumbly or Tough:
Balance butter and flour correctly and avoid overworking dough. Chill the dough before pressing into the pan to help it hold together.
Apples Turning Brown Before Baking:
Prevent oxidation by tossing apple slices with lemon juice or using ascorbic acid powder.
Uneven Baking or Burnt Edges:
Use a well-insulated baking pan and rotate halfway through baking for even heat distribution. Tent edges with foil if browning too quickly.
FAQs: What People Also Ask About Salted Caramel Apple Pie Bars
Can I use store-bought caramel sauce instead of homemade?
Yes! Store-bought caramel is convenient and works well, but homemade caramel offers better control over saltiness and thickness for a richer flavor.
What apple varieties work best for pie bars?
Granny Smith, Honeycrisp, and Braeburn apples are ideal because they hold shape and balance tartness with sweetness.
How do I store leftover bars to keep the caramel from sticking?
Store bars in an airtight container with parchment paper between layers. Refrigeration helps firm up the caramel.
Can I make these bars gluten-free or vegan?
Absolutely. Use gluten-free flours for the crust and dairy-free butter and caramel alternatives to adapt to your dietary needs.
How long do salted caramel apple pie bars last?
They stay fresh for 3–5 days refrigerated; freezing extends shelf life up to 3 months.
Can I freeze these bars, and how do I reheat them?
Freeze tightly wrapped bars in airtight containers. Thaw overnight in the fridge and warm gently in an oven or microwave before serving.

Salted Caramel Apple Pie Bars
Equipment
- 9×13-inch baking pan
- Mixing bowls
- Pastry cutter or food processor (for crust)
- Sharp knife or mandoline (for slicing apples)
- Measuring Cups and Spoons
- Spatula or spoon for spreading caramel
- Cooling rack
Ingredients
- 2 cups all-purpose flour
- 1 cup unsalted butter, cold and cubed
- ½ cup granulated sugar
- ¼ tsp salt
- 5–6 medium apples (Granny Smith or Honeycrisp), peeled, cored, and thinly sliced
- 1 tsp ground cinnamon
- ¼ tsp ground nutmeg
- ½ cup brown sugar, packed
- 1 tbsp lemon juice
- 1 cup salted caramel sauce (homemade or store-bought)
- Flaky sea salt (for sprinkling, optional)
Instructions
- Preheat oven to 350°F (175°C). Lightly grease or line your baking pan with parchment.
- In a bowl or food processor, combine flour, sugar, and salt. Cut in the cold butter until mixture resembles coarse crumbs. Press evenly into the pan to form the crust. Optionally, pre-bake crust for 10–12 minutes until lightly golden.
- In a large bowl, toss sliced apples with cinnamon, nutmeg, brown sugar, and lemon juice until well coated.
- Spread the apple mixture evenly over the crust.
- Warm caramel sauce slightly and drizzle evenly over the apples. Use a spatula to gently spread if needed.
- Bake for 35–40 minutes until caramel is bubbly and crust edges are golden.
- Remove from oven and let cool completely on a rack. Refrigerate for at least 2 hours before slicing to let caramel set.
- Sprinkle with flaky sea salt if desired, slice into bars, and serve.
Notes
- Use firm apples that hold shape during baking to avoid mushy filling.
- Chilling the bars before cutting prevents caramel from sticking and helps clean slices.
- Homemade caramel sauce elevates flavor but store-bought works well for convenience.
- For added texture, sprinkle chopped nuts or a crumb topping before baking.
- Store bars in an airtight container in the fridge up to 5 days or freeze for up to 3 months.
- Reheat gently before serving for a warm, gooey treat.