Introduction: Why Chocolate Mousse Cake Is a Timeless Dessert
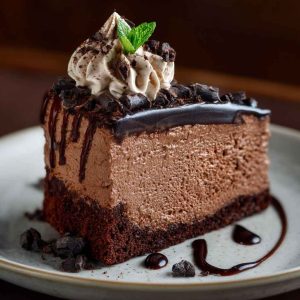
Imagine a slice of chocolate mousse cake: a silky, airy mousse nestled atop a moist sponge or dense brownie base, all wrapped in rich, glossy ganache. Each bite melts in your mouth—delicate, yet indulgent.
Chocolate mousse cake is more than just a dessert. It’s an experience that brings elegance to birthdays, anniversaries, holiday tables, or even a Tuesday night treat. Its rich texture, balanced sweetness, and luxurious appearance make it a perennial favorite among chocolate lovers and pastry chefs alike.
This article dives deep into what makes chocolate mousse cake so special. We’ll explore its origins, key elements, and step-by-step techniques for making it at home. Whether you’re a beginner baker or a seasoned pro, you’ll find expert tips, common mistakes to avoid, and irresistible variations to suit every palate.
A Quick History and Origins of Chocolate Mousse Cake
The roots of chocolate mousse cake trace back to France, the birthplace of mousse itself. The term mousse means “foam” in French, and traditional chocolate mousse became a beloved dessert in French culinary circles as early as the 18th century.
Originally served on its own in dainty cups, chocolate mousse gradually evolved into a luxurious cake component. By the 20th century, pastry chefs began layering chocolate mousse with sponge cake, genoise, or biscuit bases to create what we now know as chocolate mousse cake. This multi-textural dessert quickly spread to patisseries around the world.
Today, the cake enjoys global popularity—from French patisseries to American bakeries to high-end restaurants—thanks to its refined flavor and delicate yet satisfying composition. It’s a dessert that bridges the gap between light and decadent, airy and rich.
What Makes a Great Chocolate Mousse Cake? Key Elements
The magic of a chocolate mousse cake lies in balance—between lightness and richness, softness and structure, sweetness and intensity.
-
Mousse Texture: A great chocolate mousse is airy, smooth, and melts on the tongue. It should be light enough to contrast with the base but firm enough to hold its shape. Achieving this requires careful folding of whipped cream or egg whites into a tempered chocolate mixture.
-
Base Matters: A moist, spongy cake or a dense, fudgy brownie layer forms the foundation. The base shouldn’t overpower the mousse but should provide enough contrast to keep the bite interesting.
-
Chocolate Quality: The type and quality of chocolate used greatly influence flavor. Dark or bittersweet chocolate with at least 60–70% cocoa creates deep, complex notes. Milk chocolate offers a gentler sweetness, while white chocolate gives a creamy contrast.
-
Finishing Touches: A silky ganache glaze, cocoa dusting, or shaved chocolate can elevate both flavor and appearance.
-
Serving Temperature: Serve slightly chilled (not frozen) for the mousse to retain its texture while the chocolate flavor blooms fully on the palate.
Step-by-Step Guide: How to Make a Chocolate Mousse Cake
Step 1: Prepare the Base
Start with your chosen base—either a light sponge or a fudgy brownie layer. For sponge cake:
-
Whip eggs and sugar until thick and pale.
-
Gently fold in sifted flour and cocoa powder.
-
Bake in a springform pan and allow it to cool completely.
For a brownie base:
-
Melt butter and chocolate together.
-
Add sugar, eggs, and a small amount of flour.
-
Bake until set but still moist in the center.
Step 2: Make the Chocolate Mousse
-
Temper the chocolate: Melt bittersweet chocolate using a double boiler or microwave in 30-second bursts. Let it cool slightly.
-
Whip the cream: Beat heavy cream until soft peaks form.
-
Fold carefully: Add a small amount of whipped cream into the melted chocolate to lighten it, then gently fold in the rest to preserve the airiness.
Alternatively, for a more traditional French mousse, fold beaten egg whites into the cooled chocolate mixture instead of cream—but only if you’re comfortable with raw eggs or using pasteurized ones.
Step 3: Assemble the Cake
-
Place the cake layer in a springform pan or cake ring.
-
Pour the mousse over the base and spread evenly.
-
Smooth the top and refrigerate for at least 4 hours (overnight is best) until fully set.
Step 4: Add Finishing Touches
-
Pour a ganache over the top: warm heavy cream mixed with chopped chocolate until smooth and glossy.
-
Alternatively, dust the top with cocoa powder, pile on chocolate curls, or decorate with fresh berries for a burst of color and acidity.
Pro Tip: Use high-quality bittersweet chocolate (around 70% cocoa) for the best depth of flavor and silky-smooth texture.
Common Mistakes to Avoid When Making Chocolate Mousse Cake
Even experienced bakers can make missteps when dealing with mousse. Here are common pitfalls to watch out for:
-
Overwhipping Cream: If you whip the cream to stiff peaks, it can become grainy and hard to fold, resulting in a dense mousse. Stop at soft or medium peaks.
-
Incorrect Chocolate Temperature: Adding cold cream to hot chocolate or vice versa can cause the mixture to seize. Let the chocolate cool slightly before folding in cream or eggs.
-
Rushing Assembly: Pouring warm mousse onto the cake or rushing the chill time can result in a messy or unstable cake. Always let mousse cool slightly and chill the assembled cake thoroughly.
-
Low-Quality Chocolate: Using chocolate chips or low-cocoa-content bars will produce a dull, overly sweet mousse. Stick with couverture or baking-quality chocolate.
Flavor Variations & Creative Twists
While classic chocolate mousse cake is divine, a few simple changes can tailor it to different tastes or occasions:
-
Triple Chocolate Mousse Cake: Create layers of dark, milk, and white chocolate mousse for a beautiful contrast in color and flavor.
-
Mocha Mousse Cake: Add 1–2 teaspoons of espresso powder or a splash of coffee liqueur to the mousse. The bitterness deepens the chocolate flavor.
-
Fruit-Infused Layers: Spread raspberry or cherry preserves between the mousse and cake layers, or fold pureed berries into part of the mousse for a fruity twist.
-
Nutty Additions: Add a layer of hazelnut or almond praline for crunch. A thin spread of Nutella over the base is also delicious.
-
Boozy Touch: Mix in liqueurs like Grand Marnier, Frangelico, Amaretto, or Bailey’s for adult-friendly richness.
Pair mousse with tangy fruits (raspberries, cherries, oranges) to cut through the richness.
Expert Tips for Success
-
Use room temperature ingredients when combining chocolate with whipped cream or eggs—drastic temperature differences can cause seizing.
-
Line your springform pan with acetate or parchment strips for clean sides and easier unmolding.
-
Chill thoroughly: Always allow at least 4–6 hours of chilling, preferably overnight, for clean slicing and firm texture.
-
Use an offset spatula to level mousse and ganache layers evenly.
-
Taste your chocolate before using. The better the chocolate, the better the cake.
A cake collar or adjustable cake ring can help you layer like a pro.
Storage Instructions
Chocolate mousse cake must be kept refrigerated due to the dairy and egg content in the mousse.
-
Refrigerator: Store tightly covered for up to 4–5 days. Use a cake dome or wrap it well in plastic wrap to prevent drying out or absorbing fridge odors.
-
Freezer: You can freeze mousse cake (without toppings) for up to 1 month. Wrap the whole cake or individual slices tightly in plastic wrap and foil. Thaw overnight in the fridge before serving.
-
Decorating after freezing: Add whipped cream, ganache, or fresh fruit only after thawing to avoid soggy or dull toppings.
For perfect slices, freeze for 20 minutes before cutting with a hot knife.
Nutrition Information
Estimated per slice (based on 10 servings):
-
Calories: 420–480
-
Total Fat: 28g
-
Saturated Fat: 17g
-
Carbohydrates: 38g
-
Sugar: 30g
-
Protein: 6g
-
Fiber: 3g
Note: Nutritional values vary depending on the chocolate used and whether cream, eggs, or other add-ins are included.
To lighten it up: use whipped aquafaba instead of cream, or opt for a flourless almond base.
FAQs – Chocolate Mousse Cake
Q1: Can I make chocolate mousse cake in advance?
Yes! It actually tastes better after chilling overnight. You can make it 1–2 days ahead and add toppings right before serving.
Q2: Can I make it egg-free?
Absolutely. Use a whipped cream-based mousse instead of traditional mousse with raw egg yolks or whites. Gelatin can help stabilize the mousse if needed.
Q3: What chocolate works best?
Choose high-quality dark chocolate with 60–70% cocoa for the best balance of sweetness and intensity. Avoid chocolate chips—they often contain stabilizers that affect texture.
Q4: Why is my mousse grainy or oily?
This usually happens when:
-
The chocolate is too hot when cream is added.
-
Cream is overwhipped.
-
Ingredients aren’t folded gently enough.
Q5: Can I use store-bought cake as the base?
Yes. A thin layer of chocolate sponge cake or even brownies from the bakery can serve as a base in a pinch.
Q6: How do I slice it cleanly?
Use a sharp knife dipped in hot water, wiping between each cut. Chill the cake slightly before slicing for neater results.
Final Thoughts
Chocolate mousse cake is the perfect blend of lightness and indulgence—a luxurious yet approachable dessert that impresses every time. Whether you’re crafting a showstopper for a special occasion or just treating yourself, mastering this cake is worth every moment.
Once you get the basic technique down, the flavor possibilities are endless. From mocha swirls to fruit layers or nutty crunch, you can make this classic your own. And the best part? You don’t need professional pastry skills—just great chocolate, a little patience, and love for dessert.
Chocolate Mousse Cake
Equipment
- 8- or 9-inch springform pan or cake ring
- Mixing bowls
- Hand mixer or stand mixer
- Spatula
- Saucepan or double boiler
- Parchment paper or cake collar
- Offset spatula (optional but helpful)
- Knife and hot water for slicing
Ingredients
For the Base (choose one):
- 1 chocolate sponge cake layer (8–9 inches), cooledOR
- 1 batch of brownies, baked in a round pan and cooled
For the Chocolate Mousse:
- 200g (7 oz) high-quality bittersweet chocolate (60–70% cocoa), chopped
- 1 ½ cups (360 ml) cold heavy cream
- 1 tsp pure vanilla extract
- Pinch of salt
Optional Ganache Topping:
- 100g (3.5 oz) dark chocolate, chopped
- ½ cup (120 ml) heavy cream
Optional Garnishes:
- Cocoa powder, chocolate curls, fresh raspberries, whipped cream, mint leaves
Instructions
Prepare the Base
- Place the baked and cooled sponge cake or brownie layer in a springform pan. Line the sides with parchment paper or acetate for a clean finish.
Make the Mousse
- Melt chopped chocolate in a double boiler or microwave until smooth. Let cool slightly.In a separate bowl, whip heavy cream until soft peaks form.Add a spoonful of whipped cream to the cooled chocolate and stir to lighten the mixture. Gently fold in the remaining whipped cream with a spatula until fully incorporated.
Assemble the Cake
- Spread the mousse evenly over the base in the pan. Smooth the top with an offset spatula.Cover and refrigerate for at least 6 hours, or overnight, until fully set.
Add Ganache (Optional)
- To make ganache, heat cream until just simmering. Pour over chopped chocolate, let sit for 1 minute, then stir until smooth.Let it cool slightly, then pour over the set mousse layer and smooth the top.
Decorate and Serve
- Unmold the cake carefully. Decorate with cocoa powder, chocolate shavings, or fresh berries.Slice with a warm knife for clean cuts and serve chilled.
Notes
- Chocolate Quality Matters: Use couverture or baking chocolate for best texture and flavor—avoid chocolate chips.
- Stabilizing the Mousse: For extra firmness, add 1 tsp of dissolved gelatin (optional) to the chocolate before folding in the cream.
- Make Ahead: Best made the day before serving. Keeps well for 4–5 days in the fridge.
- Freezer-Friendly: Freeze (without decorations) for up to 1 month. Thaw in fridge overnight.