Raspberry Jam Oat Bars Recipe – Buttery, Crumbly & Perfectly Sweet
Imagine biting into a buttery oat crumble with golden edges, a soft center, and a tart-sweet layer of raspberry jam nestled in between. These Raspberry Jam Oat Bars are nostalgic, comforting, and incredibly easy to make. They’re perfect for meal prep, bake sales, holiday trays, or lunchbox treats. With a foolproof method, simple pantry ingredients, and freezer-friendly convenience, this recipe delivers bakery-style results at home. You’ll also find expert baking tips, jam selection advice, and storage guidance to ensure your bars turn out perfectly crumbly, sweet, and beautifully sliceable every time.
What Are Raspberry Jam Oat Bars?
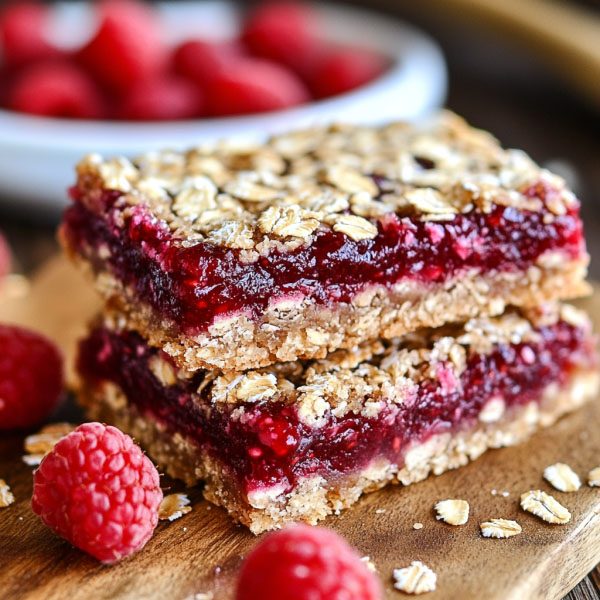
Raspberry Jam Oat Bars are layered dessert bars made with a buttery oat crumble dough that doubles as both the base and the topping, with a vibrant raspberry jam filling in the center. They’re sometimes called jam crumble bars, oatmeal jam squares, or fruit oat slices.
The texture is what makes them irresistible: a soft, slightly chewy middle, a crumbly oat topping, and lightly crisp golden edges. The raspberry layer adds brightness and a gentle tartness that perfectly balances the sweetness of the oat mixture.
Raspberries work especially well because their natural tang prevents the bars from becoming overly sweet. The contrast between tart fruit and buttery crumble creates depth of flavor.
Oat-based dessert bars have long been popular in home baking culture. They’re practical, sturdy, easy to transport, and ideal for casual gatherings, making them a timeless favorite in family kitchens.
Why You’ll Love This Raspberry Jam Oat Bars Recipe
This recipe is designed for simplicity and consistent results.
The dough comes together quickly by combining dry ingredients and stirring in melted butter. There’s no complicated creaming step or chilling required before baking.
These bars strike the perfect balance between sweet and tart. The brown sugar adds warmth, while the raspberry jam provides brightness. They’re kid-approved, sturdy enough for lunchboxes, and elegant enough for holiday dessert platters.
Because they slice cleanly once cooled, they’re also ideal for gifting or bake sales. If you’re looking for a dependable, crowd-pleasing dessert that feels homemade and comforting, this is it.
Ingredients You’ll Need
Dry Ingredients
Wet Ingredients
-
Melted butter
-
Vanilla extract
Filling
Optional Add-Ins
Ingredient Notes
Best Oats: Use old-fashioned rolled oats. Avoid instant oats, as they create a mushy texture and won’t give the bars structure.
Jam Quality Matters: Choose a thick, high-quality jam with bold raspberry flavor. Too runny, and the bars may turn soggy.
Butter Choice: Unsalted butter gives you better control over salt levels, but salted butter can be used—just reduce the added salt slightly.
Using quality ingredients ensures the perfect crumbly texture and balanced sweetness.
How to Choose the Best Raspberry Jam
Choosing the right raspberry jam makes a noticeable difference.
Seeded vs Seedless: Seedless jam creates a smoother texture, while seeded jam adds traditional character and a slight crunch.
Homemade vs Store-Bought: Homemade jam offers vibrant flavor, but a high-quality store-bought option works beautifully for convenience.
Low-Sugar vs Regular: Low-sugar jams provide more tartness. Regular jam delivers classic sweetness. Choose based on your preference.
Organic Options: Often made with fewer additives and richer fruit flavor.
Texture Is Key: The jam should be thick and spreadable—not watery.
Expert Tip: Avoid overly runny jam to prevent soggy oat bars and a messy base layer.
Equipment Needed
These simple tools make preparation easy and cleanup minimal.
Step-by-Step Instructions
Step 1: Prepare the Pan
Preheat your oven. Line an 8×8 or 9×9 baking pan with parchment paper, leaving overhang on the sides for easy removal. Lightly grease exposed sides.
Step 2: Make the Oat Crumble Dough
In a large bowl, combine oats, flour, brown sugar, baking soda, and salt. Stir well. Add melted butter and vanilla extract. Mix until the mixture becomes crumbly and evenly moistened.
Step 3: Form the Base Layer
Press about two-thirds of the crumble mixture firmly into the prepared pan.
Tip: Use the bottom of a measuring cup to create a flat, even layer. This helps prevent the jam from seeping through.
Step 4: Add Raspberry Jam Layer
Spread raspberry jam evenly over the base. Leave a small border around the edges to prevent overflow during baking.
Step 5: Add Crumble Topping
Sprinkle the remaining oat mixture evenly over the jam. Do not press it down—this keeps the topping light and crumbly.
Step 6: Bake to Golden Perfection
Bake until the top is lightly golden and the edges are slightly browned. The center may look soft but will firm up as it cools.
Step 7: Cool Completely Before Cutting
Let bars cool completely in the pan. For cleaner slices, chill before cutting into squares.
Expert Baking Tips for Perfect Oat Bars
-
Do not overbake; the bars will continue setting as they cool.
-
Always let them cool fully before slicing.
-
Use parchment overhang for easy removal.
-
Chill before cutting for sharp, clean edges.
-
Don’t overpack the crumble topping—keep it loose.
-
If bars seem soft at first, be patient; they firm up as they cool.
-
Press the base firmly but gently to create structure.
These small techniques make a big difference in texture and presentation.
Common Mistakes to Avoid
-
Using instant oats instead of rolled oats
-
Over-spreading jam too close to edges
-
Cutting bars before fully cooled
-
Using jam that’s too thin or watery
-
Skipping parchment paper
-
Not pressing the base firmly enough
Avoiding these simple mistakes ensures perfectly structured, beautifully layered oat bars every time.