Why You Should Make Puff Pastry from Scratch
There’s something magical about the buttery crackle of fresh puff pastry. Store-bought versions are convenient, sure—but they rarely capture that deep, golden flake and rich, buttery aroma that homemade puff pastry delivers. When made from scratch, puff pastry becomes more than just a dough—it’s a labor of love that rewards you tenfold in flavor and texture.
For many home cooks, the phrase “laminated dough” sounds intimidating. But here’s the good news: making puff pastry at home is totally achievable with the right technique and a little patience. You don’t need a culinary school diploma—just some time, butter, and a rolling pin.
In this guide, we’ll walk through every step of crafting your own puff pastry—from traditional folding techniques to faster “rough puff” shortcuts. By the end, you’ll not only understand the layers of puff but also have the confidence to bake with them.
What Is Puff Pastry & Its Origins?
Puff pastry, or “pâte feuilletée” in French, is a laminated dough—a dough that’s layered with butter through repeated rolling and folding. When baked, these layers rise dramatically, creating the signature airy, crispy, and tender structure we all love. There’s no yeast or chemical leavener involved. It’s the butter doing all the heavy lifting—literally.
The pastry’s origins trace back to 17th-century France, with early iterations linked to pastry chef Claude Lorrain. However, variations of puff-like doughs appeared earlier in Italian and Spanish cuisines, particularly in sfoglia and milhojas preparations, showcasing the European love affair with flaky pastry.
There are a few key styles of puff pastry:
-
Classic puff pastry uses a firm slab of butter encased in dough, with six folds and resting stages.
-
Rough puff, sometimes called cheater puff, mixes butter chunks directly into the dough.
-
Blitz puff or food processor puff is the speediest, where butter is pulsed quickly with flour for a shortcut version.
Each method creates puff—but the structure, rise, and texture vary.
Choosing Your Method: Traditional vs. Quick, Rough‑Puff & Processor Techniques
So, which method is right for you? It depends on your time, goals, and how much flake you’re after.
Traditional Puff Pastry is the gold standard. It involves folding a butter block into the dough and rolling it out with six “turns” (folds), chilling between each. This method yields the best lift and flakiest result, but takes 4–6 hours due to resting periods. It’s ideal for elegant desserts like mille-feuille or intricate savory vol-au-vents.
Rough Puff Pastry is the go-to for busy bakers. Instead of forming a butter block, you cut cold butter into the dough in chunks and fold a few times. It produces a slightly more rustic flake, but it’s still buttery, beautiful, and done in under 90 minutes.
Blitz Puff (Processor Puff) uses a food processor to quickly pulse flour and butter, then folds the dough a few times to create layers. It’s great for beginners and works wonderfully for savory tarts, sausage rolls, or breakfast pastries.
Bottom line:
-
Want perfect layers? Go traditional.
-
Need fast but flaky? Rough puff or blitz is your friend.
-
All three methods beat frozen sheets in flavor and texture.
Key Ingredients and Their Importance
The beauty of puff pastry lies in its simplicity—but each ingredient plays a major role in texture, structure, and flavor.
Flour:
Choose all-purpose flour for structure, or pastry flour if you prefer a more tender bite. Avoid bread flour—it has too much gluten, making the dough chewy rather than delicate. Look for a protein content around 9–10% for best results.
Butter:
This is where you don’t want to skimp. Use high-fat, unsalted European-style butter (like Plugrá or Kerrygold) if possible. With a fat content around 82%, these butters are softer and easier to roll without cracking, and they taste richer. The butter must be cold but pliable, not brittle or melty.
Water:
Use ice-cold water to keep the butter firm as you mix. Too warm, and you risk blending the butter into the flour, ruining the layering effect.
Salt and Optional Sugar:
Add a pinch of salt for flavor balance. If using the pastry for sweet applications, a teaspoon of sugar is a nice touch.
Butter temperature tip:
Before rolling, you want the butter and dough at similar consistencies. If the butter is too hard, it’ll break through the dough. Too soft? It’ll melt into the layers.
Essential Equipment & Prep Tips
You don’t need fancy tools to make puff pastry—but a few kitchen staples help a lot:
-
A heavy rolling pin (French style or straight cylinder) for even pressure
-
A bench scraper for flipping and trimming
-
Parchment paper or a silicone mat for rolling
-
A pastry brush to dust off flour during folding
-
Optional: a ruler to measure dough thickness
Work on a cool surface—like marble or quartz—to help control butter temperature. If your kitchen is warm, chill tools briefly or work near a fan.
Pro tip: Always chill your dough between folds to maintain layer definition and reduce sticking.
Step-by-Step Guide to Making Dough
Here’s a quick overview of the process for each method:
Traditional Puff Pastry:
-
Make a soft dough (détrempe) with flour, water, salt.
-
Shape butter into a flat square and chill.
-
Roll out the dough, place the butter inside, and fold like a letter.
-
Roll, fold, and chill — repeat six times.
-
Rest overnight, then use.
Rough Puff:
-
Cut cold butter into flour—leave visible chunks.
-
Add cold water to form a shaggy dough.
-
Roll into a rectangle, fold into thirds.
-
Chill and repeat folding 3–4 times.
Blitz/Processor Method:
-
Pulse flour, salt, and butter briefly in a food processor.
-
Add ice water until dough just comes together.
-
Roll, fold, and chill like rough puff.
Hydration & Resting Tips:
-
Don’t overmix! Stop when dough clumps but isn’t sticky.
-
Always chill at least 30 minutes between folds.
-
Let dough rest fully before final roll-out—it relaxes gluten and prevents shrinking in the oven.
Delicious Ways to Use Homemade Puff Pastry
Once you’ve crafted your own puff pastry, the options are endless—and irresistibly flaky.
Sweet ideas
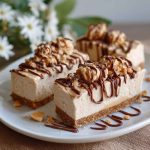
Homemade puff pastry shines in classic sweets. Make apple turnovers filled with cinnamon-spiced fruit, or whip up buttery palmiers, also known as “elephant ears,” by rolling pastry in sugar and folding it into a pinwheel. Homemade croissants are more of a hybrid, but you can use puff for a shortcut version that still offers impressive rise and flake. Add chocolate chips for pain au chocolat vibes!
Savory creations
For snackable nibbles, try cheese straws—simply twist puff pastry with shredded cheddar or Parmesan and bake until golden. Use it as a quiche topping or crust, or crown your chicken pot pie with a golden puff pastry lid. Puff pastry also makes amazing savory tarts, especially with caramelized onions, mushrooms, or goat cheese.
Seasonal and special occasions
In spring, layer your pastry with roasted asparagus and feta. In summer, create vibrant fruit galettes with berries or peaches. Fall and winter are perfect for cozy hand pies or rustic apple tarts.
Pro tip: Use up scraps to make “puff crisps.” Brush with egg wash, sprinkle with cinnamon sugar or za’atar, and bake until golden. Zero waste, maximum flavor.
Baking Tips & Serving Best Practices
When it comes to baking puff pastry, hot ovens are your best friend. Always preheat to at least 400°F (200°C)—the quick blast of heat helps water in the butter evaporate and create that signature puff.
Before baking:
-
Dock (poke) the pastry with a fork if you want it to stay flat (like for tarts).
-
Use egg wash (beaten egg or egg yolk + splash of water) for that deep golden shine.
-
For a sugar sparkle, sprinkle with coarse sugar or brush with syrup mid-bake.
When baking layers, align sheets evenly and give them space to expand. If you’re stacking pastry (like in a mille-feuille), weigh it down halfway through baking to keep layers flat.
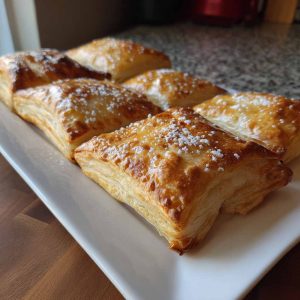
Garnish after baking with powdered sugar, herbs, or edible flowers for visual flair. Puff pastry is best served warm or at room temperature when the flake is at its peak.
Freezing, Storing & Make-Ahead Advice
Homemade puff pastry stores beautifully—just follow a few best practices.
Storing raw dough:
Wrap your dough in parchment paper, then tightly in plastic wrap or a zip-top freezer bag. Flatten into a disc or rectangle before storing to save space.
-
In the fridge: lasts up to 3 days.
-
In the freezer: keeps for up to 6 months.
Make-ahead tips:
Roll and cut shapes before freezing for quick weeknight bakes. You can even partially bake bases (like tart shells) and freeze them for fast assembly.
Thawing:
If frozen, thaw overnight in the fridge or on the counter for 30–60 minutes. Don’t microwave—gentle thawing prevents the butter from melting. Chill the dough again before rolling to ensure strong lamination.
Leftover scraps? Stack (don’t ball up), re-roll gently, and bake for rustic textures.
Health & Nutrition Overview
Let’s be honest: puff pastry is rich. Between the butter and flour, it’s naturally high in fat and calories. But there’s something to be said for indulging in quality over quantity.
By making it at home, you control:
-
The type of butter used (grass-fed, organic, unsalted)
-
How much salt or sugar goes in
-
Avoiding preservatives found in store-bought dough
Lighter alternatives include using less butter (as in rough puff) or experimenting with whole wheat pastry flour. While it’s not a health food, homemade puff pastry made with real ingredients is more wholesome and customizable than processed versions.
Frequently Asked Questions
Do I have to do all the folds?
For classic puff pastry, yes—those 6 folds create hundreds of buttery layers. But rough puff or blitz methods require fewer folds and still yield a great flake.
Can I freeze butter or dough mid-process?
Absolutely. You can freeze:
-
The butter block before enclosing it
-
The dough after 2–3 folds and finish later
-
Fully assembled dough ready to roll and bake
Just make sure it’s tightly wrapped and labeled.
Why didn’t my pastry puff properly?
This usually comes down to:
-
Butter melting into the dough (too warm)
-
Not chilling between folds
-
Oven not hot enough
-
Overworking the dough, reducing flake
Can I use margarine or lard?
Technically, yes. But you’ll miss the flavor richness of real butter. Margarine tends to have higher water content and lard lacks that buttery aroma.
Is puff pastry gluten-free?
Traditional puff isn’t, but you can make GF versions using gluten-free flour blends and xanthan gum. Results will be more delicate and may not rise quite as high.
What are common mistakes?
-
Letting the dough get too warm
-
Skipping chill steps
-
Using warm or soft butter
-
Not using enough flour while rolling
Homemade Puff Pastry
Equipment
- Rolling Pin
- Bench scraper
- Pastry brush
- Parchment paper
- Cling film or zip-top bags
- Kitchen scale (recommended)
- Large clean counter or cool surface
Ingredients
- 2 ½ cups (310g) all-purpose flour
- 1 tsp salt
- 1 cup (225g) unsalted cold butter (preferably European-style)
- ½ cup (120ml) ice-cold water
- Optional: 1 tsp lemon juice or vinegar (helps gluten control)
Instructions
- Make the détrempe (dough):In a large bowl, mix flour and salt. Add about 50g of the butter (cut into cubes) and rub it into the flour until sandy. Pour in the cold water gradually and stir until a shaggy dough forms. Shape into a rectangle, wrap, and chill for 30 minutes.
- Prepare the butter block:Place remaining butter (cold but pliable) between two sheets of parchment. Use a rolling pin to flatten into a 5x5" square. Chill if needed, but ensure it’s malleable—not rock hard.
- Enclose the butter:Roll out dough into a 10x10" square. Place butter diagonally in the center. Fold dough corners over the butter like an envelope. Pinch seams to seal. Chill 20 minutes.
- Laminate the dough:Roll the dough into a rectangle (~8x20"). Do your first fold: fold the top third down, then the bottom third up (like a letter). This is 1 fold. Rotate 90°, rest for 30 minutes in the fridge.
- Repeat the fold process for a total of 5–6 folds, chilling between each. Keep flouring lightly as needed.
- Final rest:Wrap and chill the completed dough for at least 1 hour before using.
- Use or store:Roll and shape as needed for your pastry. Freeze extra dough for up to 6 months.
Notes
- Butter matters: High-fat (82–85%) European-style butter gives best results.
- Don’t skip chilling: Cold butter = steam = flaky layers. Warm butter = soggy dough.
- Rough-puff shortcut: For faster prep, incorporate butter in chunks and skip the envelope step—still delicious, slightly less refined.
- Avoid overworking: Gentle handling is key. Overmixing can toughen the dough.
- Flavor twist: Add a pinch of sugar for sweet recipes or grated cheese/herbs for savory applications.