Introduction to Homemade Ricotta Cheese
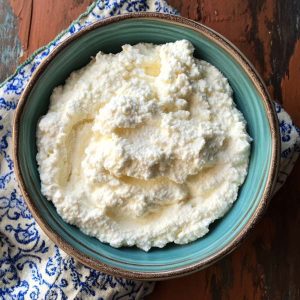
Welcome to the world of homemade ricotta cheese—where simplicity meets indulgence. Imagine a bowl of warm, freshly made ricotta: creamy, mildly tangy, and so soft it practically melts on your tongue. It’s a sensory delight that transforms everyday dishes into something special.
Why make it yourself? Because store-bought ricotta often lacks the delicate texture and nuanced flavor of the real thing. Homemade ricotta is richer, fresher, and endlessly versatile—perfect for stuffing pasta, layering in lasagna, dolloping on toast, or folding into desserts.
With just a few ingredients and basic kitchen tools, you can create a cheese that’s both rustic and refined. Whether you’re a seasoned cook or a curious beginner, this recipe is a rewarding way to connect with traditional techniques and elevate your cooking.
What Is Ricotta Cheese?
Ricotta cheese is a soft, white Italian cheese traditionally made from the whey left over after producing other cheeses like mozzarella. The name “ricotta” means “recooked” in Italian, referring to the process of heating whey to extract remaining proteins.
In modern home kitchens, ricotta is often made from whole milk and an acid (like lemon juice or vinegar), which causes the milk to curdle and form soft, fluffy curds. This method mimics the traditional process but is quicker and more accessible.
Ricotta is prized for its mild flavor, creamy texture, and culinary versatility. It’s used in both savory and sweet dishes—from lasagna and stuffed shells to cheesecakes and cannoli.
Whether made from whey or milk, ricotta remains a staple of Italian cuisine and a beloved ingredient worldwide.
Origins & Cultural Significance
Ricotta has deep roots in Italian culinary history, dating back to ancient Roman times. Originally made from sheep’s milk whey, it was a way to use every part of the cheese-making process—nothing wasted.
Over time, regional variations emerged:
- Sheep’s milk ricotta is traditional in southern Italy and Sicily
- Cow’s milk ricotta is more common in northern regions and modern kitchens
Ricotta plays a starring role in many classic Italian dishes:
- Lasagna: layered with pasta and tomato sauce
- Ravioli: mixed with herbs and stuffed into pasta
- Cannoli: sweetened and piped into crispy pastry shells
Its versatility and affordability made it a staple in both peasant cooking and celebratory meals. Today, ricotta continues to bridge tradition and innovation, appearing in everything from rustic spreads to gourmet creations.
Choosing the Right Ingredients
Milk: Use whole milk for the creamiest ricotta. Avoid ultra-pasteurized milk, which may not curdle properly. For extra richness, add a splash of heavy cream.
Acid: You’ll need an acid to trigger curdling:
- Lemon juice: adds a subtle citrus note
- White vinegar: neutral flavor
- Citric acid: precise and consistent
Use about 3–4 tablespoons per quart of milk.
Salt (Optional): A pinch of salt enhances flavor but isn’t required. Add it after curds form for better control.
Optional Additions:
- Fresh herbs (thyme, basil, chives) for savory ricotta
- Honey or vanilla for sweet applications
Equipment:
- Non-reactive pot (stainless steel or enamel)
- Thermometer to monitor temperature (target: 185°F / 85°C)
- Cheesecloth or fine mesh strainer
- Ladle for gentle curd handling
- Colander for draining
Choosing quality ingredients and proper tools ensures your ricotta is flavorful, creamy, and perfectly textured.
Step-by-Step Ricotta-Making Process
1. Heat the Milk Pour 1 quart of whole milk into a non-reactive pot. Add ¼ cup cream (optional for richness). Heat gently over medium heat until it reaches 185°F (85°C), stirring occasionally to prevent scorching.
2. Add Acid Remove from heat. Slowly stir in 3 tablespoons lemon juice (or vinegar/citric acid). Stir gently for 1–2 minutes. You’ll see curds begin to form and separate from the whey.
3. Rest Let the mixture sit undisturbed for 10–15 minutes. This allows curds to fully develop.
4. Drain Line a colander with cheesecloth and place over a bowl. Use a ladle to gently transfer curds into the cloth. Let drain for:
- 10–15 minutes for creamy ricotta
- 30–60 minutes for firmer ricotta
You can adjust the texture based on your intended use.
5. Season and Store Sprinkle with salt if desired. Transfer to an airtight container and refrigerate. Use within 3–5 days.
Pro Tip: Avoid pressing or squeezing the curds. Let gravity do the work for a delicate texture.
Homemade ricotta is now ready to elevate your pasta, toast, or desserts.
Common Mistakes to Avoid
Overheating the milk can scorch it or prevent proper curd formation. Keep a close eye on the temperature.
Using ultra-pasteurized milk often results in poor curdling. Always check the label before starting.
Skipping the rest time after adding acid can lead to weak curds and poor texture.
Not using fine cheesecloth may cause curds to slip through, leaving you with a watery result.
Avoid these mistakes and your ricotta will be creamy, flavorful, and beautifully textured—just like the Italian original.
Homemade Ricotta Cheese Recipe – Easy Fresh Cheese with Milk & Lemon
Equipment
- Non-reactive pot (stainless steel or enamel)
- Thermometer
- Cheesecloth or fine mesh strainer
- Colander
- Ladle
- Mixing bowl
Ingredients
- 1 quart (4 cups) whole milk
- ¼ cup heavy cream (optional, for richness)
- 3 tbsp lemon juice or white vinegar
- ¼ tsp salt (optional)
- Optional add-ins: chopped herbs, honey, cinnamon, orange zest
Instructions
- Heat the Milk In a non-reactive pot, combine milk and cream. Heat gently to 185°F (85°C), stirring occasionally.
- Add Acid Remove from heat. Stir in lemon juice or vinegar slowly. Curds will begin to form.
- Rest Let the mixture sit undisturbed for 10–15 minutes to allow full curd formation.
- Drain Line a colander with cheesecloth. Use a ladle to gently transfer curds. Let drain:10–15 minutes for creamy ricotta30–45 minutes for firmer ricotta
- Season and Store Sprinkle with salt if desired. Transfer to a container and refrigerate. Use within 5 days.
Notes
- Avoid ultra-pasteurized milk—it may not curdle properly
- Use a thermometer to prevent overheating
- Customize with herbs for savory dishes or honey and zest for sweet applications
- Not freezer-friendly—texture changes
- Vegan alternatives: almond or tofu-based ricotta with lemon juice and nutritional yeast
- Delicious in lasagna, cannoli, pancakes, toast, dips, and more