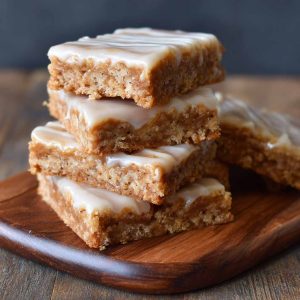
Crispy Homemade Maple Bars with Sweet Maple Glaze – Easy Breakfast Recipe
These Crispy Homemade Maple Bars with Sweet Maple Glaze are golden, crunchy, and soft inside. An easy breakfast or brunch recipe perfect for maple lovers.
Equipment
- Mixing bowl and spatula
- Stand mixer or hand mixer (optional)
- Rolling Pin
- Baking sheet and parchment paper
- Candy thermometer (for frying or glaze)
- Wire rack for cooling and glazing
- Knife or dough scraper
Ingredients
For the Dough:
- 3 ½ cups (450 g) all-purpose flour (or bread flour for extra elasticity)
- 2 ¼ tsp (1 packet) active dry yeast or instant yeast
- ¼ cup (50 g) granulated sugar
- ½ tsp salt
- 2 large eggs
- ¾ cup (180 ml) warm milk
- ¼ cup (60 g) unsalted butter, softened
For the Maple Glaze:
- 1 cup (120 g) powdered sugar
- 2–3 tbsp real maple syrup
- 1–2 tbsp milk or cream
- ½ tsp vanilla extract
Optional Toppings:
- Chopped nuts (pecans, walnuts, almonds)
- Cinnamon or sea salt
- Chocolate drizzle
Instructions
Prepare Dough:
- Mix flour, yeast, sugar, salt, eggs, milk, and butter.Knead until smooth and elastic.Let dough rise 1–2 hours in a warm, draft-free area until doubled.
Shape Bars:
- Roll dough to even thickness and cut into rectangles.Let bars rise 30–45 minutes for airy texture.
Cook Bars:
- Fry: Heat oil to 175–180°C (350°F), fry 3–4 minutes per side until golden.Bake: Brush with butter; bake at 200°C (400°F) for 12–15 minutes.
Cool:
- Transfer to wire rack and cool slightly before glazing.
Prepare Glaze:
- Whisk powdered sugar, maple syrup, milk, and vanilla until smooth.Adjust thickness to coat bars properly; warm slightly if needed.
Glaze & Finish:
- Dip or drizzle glaze over bars.Optional: sprinkle nuts, cinnamon, or chocolate drizzle.Let glaze set 5–10 minutes before serving.
Notes
- Crispiness: Use bread flour and fry/bake at correct temperature.
- Proofing: Ensure first and second rise to avoid dense bars.
- Glaze: Avoid glazing immediately after frying to prevent sogginess.
- Variations: Add nuts, chocolate drizzle, or spiced glaze for extra flavor.
- Make Ahead: Dough can be refrigerated before shaping; glaze just before serving.
- Freezing: Un-glazed bars freeze up to 1 month; glaze after thawing for best texture.