A Bakery-Worthy Treat at Home
The first time I made cheese Danish at home was for a lazy Sunday brunch — the kind where you sip coffee slowly and let the oven do the work. I remember pulling the tray out and being stunned: golden, flaky pastries with creamy centers that looked straight out of a bakery window. And the best part? I hadn’t spent hours folding dough or mastering lamination.
That’s the magic of puff pastry cheese Danish. It’s a shortcut that doesn’t feel like one. With store-bought puff pastry and a simple cream cheese filling, you get all the elegance of a European pastry with none of the stress.
These Danishes are flaky, creamy, and endlessly customizable. Stick with the classic cheese version, or add fruit preserves, fresh berries, or a hint of lemon zest for a twist. Whether you’re hosting brunch, treating yourself, or baking for someone special, this recipe delivers comfort and sophistication in every bite.
What Is a Puff Pastry Cheese Danish?
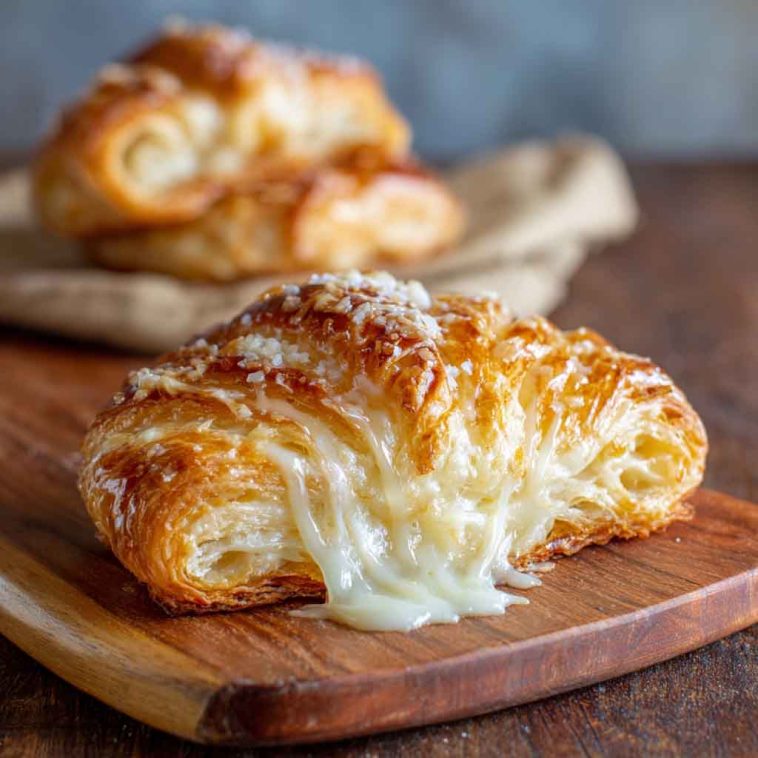
A puff pastry cheese Danish is a simplified version of the traditional Danish pastry — a flaky, golden shell filled with sweetened cream cheese and baked until beautifully puffed.
While classic Danish pastries use laminated yeast dough (think croissants), this version relies on store-bought puff pastry for ease and speed. The result is just as impressive, with layers of crisp pastry and a rich, creamy center.
Inspired by European bakery traditions, this shortcut recipe is perfect for home bakers who want stunning results without the technical challenge. It’s ideal for brunch spreads, holiday mornings, or a cozy afternoon treat. And because puff pastry is so versatile, you can easily adapt the filling to suit your mood — from tangy lemon curd to fruity jam or even chocolate.
Why This Recipe Is So Popular
There’s a reason puff pastry cheese Danish has become a go-to for home bakers: it’s fast, flexible, and foolproof.
Using store-bought puff pastry means no rolling, folding, or chilling — just thaw, cut, and bake. The prep takes minutes, and the bake time is under 20, so you can go from craving to serving in less than 40 minutes.
It’s also incredibly customizable. Add fruit preserves, swirl in lemon curd, or drizzle with chocolate — the base recipe welcomes creativity.
And let’s not forget the presentation. These pastries puff up beautifully, with golden edges and creamy centers that look like they came from a patisserie. Serve them for brunch, dessert, or alongside your afternoon coffee, and you’ll have guests asking for the recipe every time.
Key Ingredients & Flavor Breakdown
The beauty of this recipe is how a few simple ingredients come together to create something truly special.
Puff Pastry
- Use store-bought frozen puff pastry for ease.
- Brands like Trader Joe’s, Dufour, or Whole Foods 365 offer great quality.
- Thaw in the refrigerator overnight — not at room temp — to prevent cracking or stickiness.
Cream Cheese Filling
- Full-fat cream cheese gives the richest flavor and creamiest texture.
- Soften it at room temperature for easy mixing.
- Sweeten with powdered sugar (for smoothness) or granulated sugar if preferred.
- Add egg yolk for richness and structure.
Flavor Enhancers
- A splash of vanilla extract adds warmth.
- Lemon zest brightens the filling and cuts through the richness.
- A touch of almond extract gives a bakery-style twist.
Optional Toppings
- Fruit preserves like cherry, raspberry, or blueberry add color and flavor.
- Fresh fruit can be added after baking.
- A simple powdered sugar glaze or drizzle of honey finishes it beautifully.
Bold Tip: Always thaw puff pastry in the fridge. Room temp thawing can make it sticky and hard to work with — and you want those flaky layers to shine.
Equipment You’ll Need
You don’t need fancy tools — just a few basics:
- Baking sheet lined with parchment paper
- Mixing bowl and spatula for the filling
- Pastry brush for egg wash
- Knife or pizza cutter to shape the pastry
- Optional: offset spatula for spreading the filling neatly
These tools help you work cleanly and efficiently. If you’re making a big batch, prep everything ahead so assembly is smooth and fun.
Step-by-Step Preparation Guide
Step 1: Thaw puff pastry in the fridge and cut into 6–8 rectangles. Step 2: Score a ½-inch border around each rectangle and prick the center with a fork to prevent puffing. Step 3: Mix cream cheese, sugar, egg yolk, vanilla, and lemon zest until smooth. Step 4: Spread filling inside the scored border using a spoon or offset spatula. Step 5: Add a spoonful of fruit preserves or topping of choice. Step 6: Brush edges with beaten egg for a golden finish. Step 7: Bake at 400°F (200°C) for 15–18 minutes until puffed and golden brown. Step 8: Cool slightly before serving. Optional: drizzle with glaze or dust with powdered sugar.
Bold Tip: Don’t overfill — cream cheese expands slightly during baking and can spill over the edges.

Easy Puff Pastry Cheese Danish – Flaky, Creamy & Bakery-Worthy in Minutes
Equipment
- Baking sheet
- Parchment paper
- Mixing bowl
- Spatula
- Pastry brush
- Knife or pizza cutter
- Optional: offset spatula for spreading
Ingredients
- 1 sheet frozen puff pastry, thawed in fridge
- 4 oz full-fat cream cheese, softened
- 2 tbsp powdered sugar (or granulated sugar)
- 1 egg yolk (for filling)
- ½ tsp vanilla extract
- 1 tsp lemon zest (optional)
- 1 whole egg (for egg wash)
- 6 tbsp fruit preserves (e.g., cherry, raspberry, blueberry)
- Optional: powdered sugar glaze or fresh fruit for topping
Instructions
- Prep the PastryPreheat oven to 400°F (200°C).Unfold thawed puff pastry and cut into 6–8 rectangles.Score a ½-inch border around each piece and prick the center with a fork.
- Make the FillingIn a bowl, mix cream cheese, sugar, egg yolk, vanilla, and lemon zest until smooth.
- Assemble the DanishesSpread filling inside the scored border.Add 1 tbsp of fruit preserves on top of the filling.Brush edges with beaten egg.
- BakeBake for 15–18 minutes until puffed and golden.Cool slightly before serving.Optional: drizzle with glaze or dust with powdered sugar.
Notes
- Thaw puff pastry in the fridge to prevent cracking or stickiness.
- Don’t overfill — cream cheese expands slightly during baking.
- Customize with lemon curd, Nutella, or chocolate chips for flavor twists.
- Store leftovers in the fridge for up to 3 days; reheat gently in a toaster oven.
- For mini versions, cut smaller squares and reduce bake time slightly.