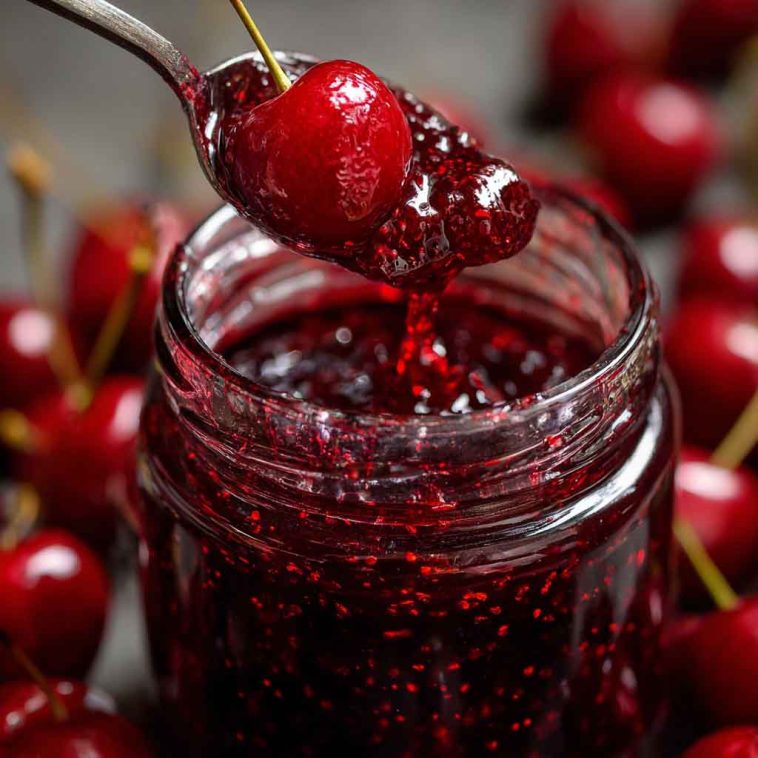
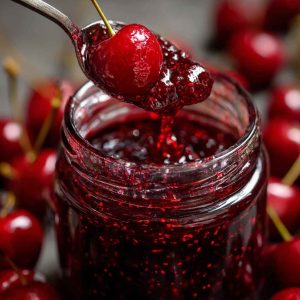
The Magic of Cherries and Vanilla
There’s something utterly enchanting about the aroma of cherries and vanilla simmering on the stove. It evokes memories of summer mornings, sun-drenched orchards, and cozy breakfasts filled with sweet anticipation. The deep, rich flavor of cherries paired with the creamy, warm notes of vanilla creates a timeless combination that’s both comforting and sophisticated.
This Cherries Vanilla Jam recipe brings that magic into your kitchen, whether you’re a beginner eager to try your hand at preserves or a jam enthusiast looking for a seasonal treat. With just a few ingredients and some patience, you can transform ripe, juicy cherries into a luscious, spreadable jam that captures the essence of summer. It’s perfect on toast, dolloped over yogurt, swirled into desserts, or even used as a thoughtful homemade gift. And the best part? You control the sweetness, the flavor intensity, and the texture, creating a jam that’s truly your own.
Why Make Your Own Cherries Vanilla Jam
Homemade jam has a charm that store-bought versions can’t match. By making Cherries Vanilla Jam yourself, you enjoy fresher, more vibrant fruit flavor and a richness that pre-packaged jars rarely achieve. You can tailor the sugar level to your taste — whether you prefer it lightly sweet or luxuriously sweetened — and skip any artificial preservatives or additives.
There’s also a certain seasonal joy in transforming freshly picked cherries into a spread that will last all year. Summer cherry harvests are brief, but preserving them allows you to enjoy the taste of the season long after the fruit disappears from the market. Homemade jam also offers versatility: you can gift it in pretty jars, layer it into desserts, or simply spread it on toast for a decadent breakfast treat. Every spoonful is a celebration of summer fruit at its peak.
Ingredient Spotlight & Flavor Science
Cherries – Choosing the right variety is crucial. Sweet cherries like Bing and Rainier offer a natural sweetness and deep color, while tart cherries like Montmorency provide a bright, tangy punch. Many jam makers blend sweet and tart cherries to achieve a balanced flavor profile that’s neither cloying nor overly sharp.
Vanilla – Vanilla adds depth and warmth to your jam. Vanilla pods deliver a rich, fragrant intensity; vanilla extract is convenient and consistent; vanilla paste gives both the flavor and the visual appeal of tiny vanilla specks. Choose based on preference and availability.
Sugar – Beyond sweetness, sugar acts as a preservative, helping the jam set and maintain its structure. Adjusting sugar levels affects not only flavor but also the texture and shelf life of the finished product.
Lemon Juice – A splash of lemon juice adds necessary acidity to balance the sweetness and enhance the natural cherry flavor. It also helps with gel formation by interacting with the pectin in the fruit.
Pro Tip: For a deeper, more infused flavor, macerate your cherries with sugar overnight before cooking. This allows the sugar to draw out the fruit juices, creating a naturally syrupy base that intensifies the cherry aroma and taste.
Essential Tools & Prep Steps
Heavy-Bottom Saucepan or Jam Pan – Ensures even heat distribution and prevents scorching.
Sterilized Glass Jars and Lids – Critical for safe storage and long-term preservation.
Wooden Spoon, Ladle, and Jam Funnel – For stirring, transferring, and neatly filling jars.
Candy Thermometer – Helps reach precise gelling temperatures for perfect set.
Prep Tip: Wash, pit, and stem your cherries in advance, and have your jars sterilized while the jam cooks. A little organization at the start makes the process smooth and enjoyable.
Step-by-Step Cherries Vanilla Jam Instructions
Step 1 – Prep the Cherries
Wash, pit, and stem your cherries. Slice or halve them, depending on your desired jam texture. For a more rustic, chunky jam, leave them in halves; for smoother jam, you can lightly crush them with a spoon.
Step 2 – Combine Ingredients
Place cherries in a large saucepan or jam pan. Add sugar and the scraped seeds from a vanilla pod (or your preferred vanilla extract/paste). Add lemon juice to balance sweetness and support gel formation. Mix gently to combine.
Step 3 – Macerate (Optional)
Allow cherries and sugar to sit for 30 minutes to 1 hour (or overnight in the fridge) to release natural juices. This enhances flavor and helps create a syrupy base for cooking.
Step 4 – Cook the Jam
Bring the mixture to a boil over medium heat, stirring frequently to prevent scorching. Reduce heat to maintain a steady simmer. Continue cooking, skimming foam if necessary, until the jam reaches the gel point (about 220°F / 104°C) or passes the wrinkle test: place a small amount on a chilled plate, push with your finger, and it should wrinkle slightly without running.
Step 5 – Jar the Jam
Remove from heat and carefully ladle the hot jam into sterilized jars using a jam funnel. Leave about ¼-inch headspace at the top. Wipe rims clean, seal with lids, and allow to cool at room temperature.
Step 6 – Store and Enjoy
Store sealed jars in a cool, dark place. Refrigerate after opening. The jam will continue to thicken slightly as it cools.
Expert Tip: Stir constantly during cooking, especially as the jam thickens, to prevent sticking or burning. Use a heavy-bottomed pan to ensure even heat distribution.
Flavor Variations & Creative Twists
Homemade jam is incredibly versatile, and Cherries Vanilla Jam lends itself beautifully to creative variations:
Cherry-Almond Jam – Add ½ teaspoon almond extract or fold in slivered almonds for a nutty depth.
Spiced Cherry Jam – Sprinkle in a pinch of cinnamon, cardamom, or cloves while cooking for a cozy, aromatic twist.
Mixed Berry Version – Combine cherries with raspberries, blackberries, or blueberries for a vibrant, tangy jam.
Lighter-Sugar Jam – Reduce sugar by 25% for a less sweet but still flavorful spread. Adjust pectin or cook slightly longer to achieve the right set.
Chunk-Free Jam – Blend cooked cherries with an immersion blender for a smooth, dessert-style spread perfect for layering in pastries or swirls.
These variations allow you to tailor your jam to personal taste, gifting occasions, or seasonal fruit availability while keeping the signature cherry-vanilla essence intact.
Serving Suggestions & Pairings
Cherries Vanilla Jam is versatile and can enhance many dishes:
Breakfast – Spread over toast, bagels, or English muffins for a fruity start to the day.
Dessert – Dollop on ice cream, yogurt, or cheesecake for added flavor and visual appeal.
Baking – Swirl into muffins, scones, or cakes for a fruity, aromatic surprise.
Gifting – Fill small jars with jam and tie with a ribbon for homemade gifts.
Pairings – Works beautifully with nut butters, soft cheeses like brie, or buttery croissants.
The natural cherry flavor combined with warm vanilla makes it a charming addition to both everyday meals and special occasions.
Storage & Make-Ahead Tips
Proper storage ensures your jam stays safe and flavorful:
Room Temperature – Store sealed, sterilized jars in a cool, dark place for up to 1 year.
After Opening – Keep in the refrigerator and consume within 3–4 weeks.
Freezing – Spoon jam into airtight containers or freezer-safe jars for up to 6 months. Thaw in the fridge before use.
Make-Ahead Tip – Cook your jam and let it cool to room temperature before sealing jars. The flavor often improves after a few days as the cherries and vanilla meld.
Always check for spoilage before consuming, especially if sugar was reduced in your recipe.
Expert Tips for the Best Cherries Vanilla Jam
Fruit Quality – Use fresh, ripe cherries for the brightest flavor. Avoid overripe or mealy fruit.
Maceration – Allowing cherries to macerate in sugar overnight enhances depth and creates natural syrup.
Stirring – Stir frequently during cooking to prevent scorching and ensure even heat distribution.
Gel Point – Test doneness with a candy thermometer or the cold plate “wrinkle test” to get perfect set without overcooking.
Vanilla Addition – Add vanilla near the end of cooking to preserve its delicate aroma; adding too early can diminish flavor.
Clean Jars – Sterilize jars and lids to ensure safe, long-term storage.
FAQs – People Also Ask
Q: Can I make this jam without vanilla?
A: Yes, but vanilla complements cherries’ natural sweetness and enhances depth. Consider adding a small splash of almond extract or a pinch of cinnamon as an alternative.
Q: Can I use frozen cherries?
A: Absolutely. Thaw them first, drain excess liquid, then proceed as with fresh cherries. Some adjustments in cooking time may be necessary.
Q: How do I achieve a thick jam without pectin?
A: Cook longer to reduce liquid, or macerate cherries overnight to create a naturally syrupy base. Adding lemon juice also helps natural pectin release.
Q: Can I make a low-sugar or sugar-free version?
A: Yes, but reduce sugar gradually. Using sugar substitutes may affect gelling; monitor consistency and cook slightly longer if needed.
Q: How should I store my jam after opening?
A: Keep refrigerated and consume within 3–4 weeks. Always use a clean spoon to avoid contamination.
Q: Can I use this jam in baking?
A: Yes! It’s perfect for filling tarts, swirls in muffins, layering in cakes, or glazing pastries.
Conclusion & Reader Invitation
Cherries Vanilla Jam captures the essence of summer in a jar, combining bright cherry flavor with warm vanilla notes. It’s perfect for breakfast, dessert, gifting, or baking. Try your own variations, share your creations, and enjoy the sweet satisfaction of homemade preserves that celebrate the season.
Cherries Vanilla Jam – Sweet, Luscious & Homemade
Equipment
- Heavy-bottomed saucepan or jam pan
- Wooden spoon
- Ladle and jam funnel
- Candy thermometer
- Sterilized glass jars with lids
- Small bowl for cold plate test (optional)
Ingredients
For the Jam:
- 4 cups (about 1 lb / 450 g) fresh or thawed cherries, pitted
- 2 cups (400 g) granulated sugar
- 1 vanilla pod (or 1–2 tsp vanilla extract or paste)
- 2 tbsp fresh lemon juice
Instructions
- Prep the cherries: Wash, pit, and halve or slice cherries as desired. For a smoother texture, lightly crush them.
- Combine ingredients: Place cherries, sugar, vanilla, and lemon juice in a heavy-bottomed saucepan. Stir gently.
- Optional maceration: Let cherries sit for 30 minutes to 1 hour (or overnight in fridge) to release juices and enhance flavor.
- Cook the jam: Bring mixture to a boil over medium heat, stirring frequently. Reduce to a simmer, cooking until thickened and reaching 220°F (104°C) or passing the cold plate wrinkle test.
- Skim foam: Remove any foam that forms on top during cooking.
- Jar the jam: Carefully ladle hot jam into sterilized jars using a funnel. Leave ¼-inch headspace, wipe rims, and seal with lids.
- Cool & store: Let jars cool to room temperature. Store sealed in a cool, dark place for up to 1 year; refrigerate after opening and consume within 3–4 weeks.
Notes
- Use a mix of sweet and tart cherries for balanced flavor.
- Stir frequently during cooking to prevent burning.
- Add spices like cinnamon or cardamom for variation.
- Reduce sugar slightly for a less sweet jam; adjust cooking time for proper set.
- Vanilla should be added toward the end of cooking to preserve its aroma.
- Can be frozen for up to 6 months; thaw in refrigerator before use.